Most conversations about food styling focus on the aesthetic decisions: the props, the composition, the light, the negative space. Those things matter, and they’re a significant part of what makes one image work well, while another doesn’t really hit the spot. But there’s a layer underneath all of it that rarely gets talked about — the food science. The way food behaves chemically and physically under heat, light, and time determines what it looks like on camera, often more directly than any styling choice made on the surface.
I came to food photography from a background in chemistry, which means I’ve always thought about what’s happening inside the food, not just on it. Over the years on set, that thinking has changed the way I approach everything — from how I plan a shot to what I do when something stops looking right. This post is about six of the food science principles I apply most regularly in styling and photography, and what each one actually means when the camera is in front of you.
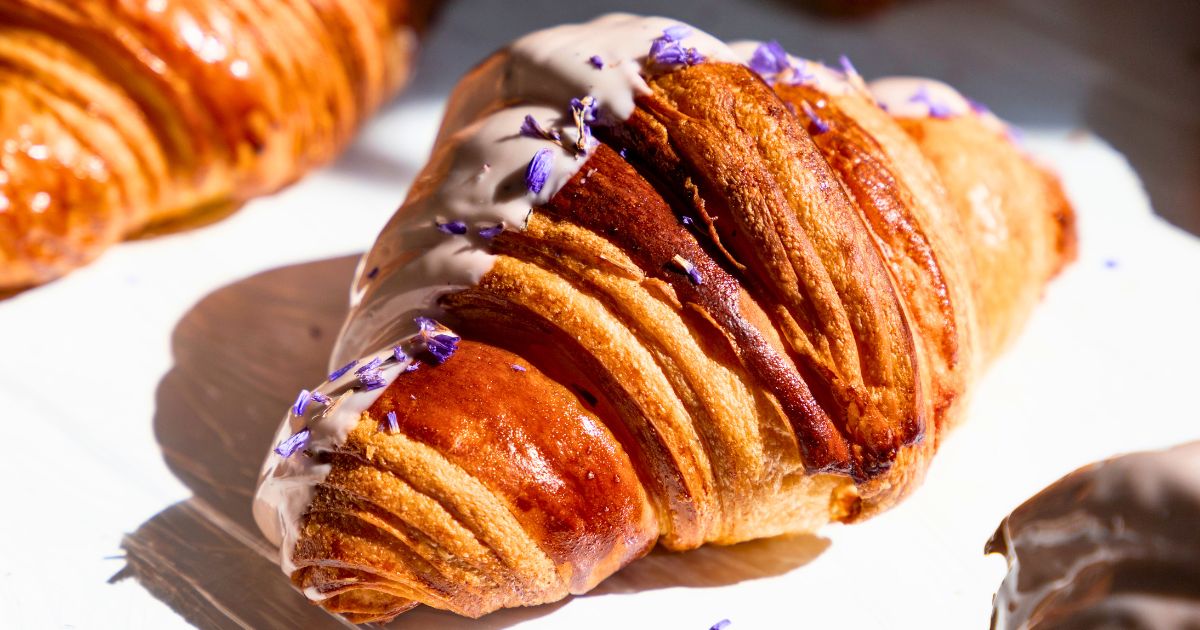
Browning: the Maillard reaction and what it does to a surface
Browning from the Maillard reaction is obviously a flavour story, but it’s also a visual one, and understanding what it does to the surface of food changes how you think about capturing it.
When food browns (whether it’s a crust, a sear, a roasted vegetable, or a toasted slice of bread), the surface undergoes a chemical transformation that produces hundreds of new compounds. Those compounds absorb and reflect light differently from the pale, unreacted surface beneath them. The result is depth, texture, and dimensionality that a camera responds to in a way that raw or unbrowned food rarely achieves. Browning creates the visual contrast that makes food look properly cooked rather than just heated — and that contrast, between a deeply coloured surface and a lighter interior or background, is part of what stops someone mid-scroll.
From a styling perspective, this means browning is something to work with deliberately, not accidentally. Achieving it requires dry surfaces and sufficient heat (moisture keeps the temperature too low for the reaction to proceed), which is why pressing moisture out of food, patting surfaces dry before cooking, and not overcrowding a pan are all styling decisions as much as cooking ones. It also means knowing when not to go there: some food aesthetics are built on paleness (a pale crumb, a lightly baked pastry, a delicate dessert), and forcing browning into those contexts produces the wrong result entirely.
There’s a full breakdown of the chemistry behind the Maillard reaction (what it is, what conditions trigger it, and why it produces such different results in different foods) in this post.
Enzymatic browning — the kind that works against you
There’s another kind of browning that has nothing to do with heat, and it’s one of the more persistent challenges in food styling: enzymatic browning. This is what happens to a cut apple, a sliced avocado, a halved mushroom, or a peeled potato left exposed to air. Within minutes, the surface starts turning grey-brown. The food is still perfectly edible. It just doesn’t look it.
The mechanism is specific: when the cells of certain fruits and vegetables are cut or damaged, an enzyme called polyphenol oxidase (PPO) comes into contact with phenolic compounds inside the cell. In the presence of oxygen, PPO converts those phenols into quinones, which then polymerise into the brown-coloured compounds visible on the surface. The browner and duller it gets, the further the reaction has progressed.
On a shoot, this window between cutting and visible browning is one of the things I think about constantly with fresh produce. The practical responses are well known: a citric acid solution (lemon juice or a diluted citric acid wash) lowers the pH below the range where PPO works efficiently; ascorbic acid (vitamin C) reduces the quinone compounds back to phenols, effectively pausing the reaction. Cold water slows the enzyme’s activity. Blanching helps with it entirely, though at the cost of texture and colour in the vegetable itself.
What this means on set: cut produce as late as possible before the shot. Have your solution ready (usually a light lemon water) to brush or dip surfaces immediately. Know which foods brown fastest (avocado, banana, apple, potato, artichoke) and build the shoot plan around them accordingly. And if something has started to turn, know whether a fresh cut will reveal an unbrowning layer underneath, or whether the discolouration has gone too deep to salvage quickly.
Emulsification: why some sauces look alive and others don’t
A stable emulsion and a broken one are immediately distinguishable on camera, even before you analyse what went wrong. A sauce that’s holding (glossy, smooth, cohesive) has a surface that catches light evenly and reflects it back with that characteristic sheen. A broken sauce looks dull, separated, and oily around the edges. The difference isn’t subtle, and it’s not something you can easily fix in post-production.
This is because a stable emulsion is doing something optically that a broken one isn’t. The fine, evenly distributed droplets in a proper emulsion scatter light uniformly across the surface. When those droplets coalesce and the phases begin to separate, the surface becomes uneven — oil pools create their own reflections while the water-based liquid goes flat beneath them. The whole thing reads as wrong on camera in a way that’s difficult to articulate, but it’s easy to notice.
The practical implication is that maintaining an emulsion during a shoot (which might run for hours under lights that raise the ambient temperature) requires active management. Cooler temperatures help stability and studio lighting might work against you. Knowing which emulsifiers are in a given sauce tells you roughly how long it will hold before intervention is needed, and what to do when it starts to go: a small amount of lecithin (available as lecithin granules) can often re-emulsify a sauce that’s beginning to separate without visibly changing its appearance or flavour.
The full science of how emulsions form, what makes them stable, and why they break, is covered in depth here.
Moisture and steam: the science of timing
Steam rising from food is one of those visual details that makes a photograph feel alive and adds an extra layer of interest — it signals heat, freshness, the moment just after cooking. It’s also gone within seconds if you’re not ready for it.
What we see as steam rising from food is actually water droplets condensing as water vapour hits the cooler surrounding air. The visible “steam” appears almost immediately once hot food meets the ambient temperature difference, and dissipates as that temperature gap closes. On set, this means the window for capturing it is short and predictable: the food comes out of the oven or off the heat, and you have perhaps ten to thirty seconds of visible steam depending on the temperature differential and the environment. Knowing this, you plan the shot before the food arrives, not after.
Moisture has a separate and equally important role in how food surfaces look and behave. Wet surfaces don’t brown — they can’t reach the temperatures needed for browning reactions while moisture is evaporating. But wet surfaces do catch light in a specific way that’s useful for other purposes: the sheen on fresh herbs, the gloss on a freshly dressed salad, the visible moisture on a piece of chilled fish. Knowing when to add or remove moisture from a surface is a consistent part of how I style on set, because these surfaces create a kind of luminosity that dry surfaces don’t.
Condensation works as a real styling tool for cold subjects — a glass of iced water, a chilled bottle, a bowl of ice cream. Condensation forms when warm, humid air meets a surface cold enough to bring that air below its dew point. In practice: chill the vessel thoroughly, bring it into a warm environment, and give it a few minutes before shooting. A light mist of water can also produce the visual effect quickly if the real condensation isn’t forming fast enough, though it tends to look slightly different on camera.
Temperature and texture — working in windows
Temperature might be the variable I manage most actively on a shoot. Not just because of browning or steam, but because temperature controls texture — what food looks like, how it holds, whether it stays in the state you need it to be in long enough to capture.
Different fats melt at different temperatures, and this matters enormously for how food holds on set or under studio lights. Cocoa butter, the fat in chocolate, melts in the range of approximately 34–38°C, which is almost exactly body temperature, and low enough that in a warm room or under lights, chocolate decorations, chocolate bars, or anything with a chocolate component can start softening faster than you’d expect. The same logic applies to butter (which starts softening noticeably around 20°C and is fully melted by around 32–35°C), to any whipped cream stabilised without gelatin, and to fat-based sauces and glazes that hold beautifully at room temperature but soften quickly once conditions warm up.
Ice cream sits at one end of this spectrum: too cold and it’s hard and opaque, too warm and it loses its shape entirely. The window where it looks right for photography (softened enough to scoop cleanly, holding its form, showing texture rather than ice crystals) is narrow and requires knowing roughly what temperature you’re working with. Scooping and re-freezing briefly before shooting is standard practice (so is chilling the bowl it will sit in). Depending on the scope of the shoot and what the ice cream needs to communicate, a stand-in is sometimes the more practical choice — a purpose-made fake ice cream that holds its shape indefinitely under any conditions. This isn’t something that works for every brief: if the ice cream itself is the product being sold, or if the shoot requires the food to be real for legal or client reasons, stand-ins aren’t an option. But for a lifestyle shot where ice cream appears as a supporting element, or where the priority is the setting rather than the scoop itself, a stand-in can truly make the difference.
Gelatin-set dishes (like panna cotta, certain mousses and jellies) behave in the opposite direction: they need to stay cold to hold their shape, which means working fast and returning them to refrigeration between setups if the shoot is long.
Understanding these windows means planning the sequence of a shoot around them rather than fighting them. The items most sensitive to temperature come out last, get shot first, and go back as soon as the frame is captured.
Light and surfaces: chemistry, physics, and what the camera actually sees
This one is at the intersection of food science and physics, but it follows directly from everything above. The reason food looks the way it does under light (glossy or matte, dimensional or flat, luminous or dull) comes back to the physical properties of its surface, which are a direct result of its chemical composition and state.
A smooth emulsified sauce creates specular reflection: light hits the surface at an angle and bounces back in a concentrated, predictable way, creating the bright highlights that make a sauce look glossy and fresh. A broken or matte surface creates diffuse reflection: light scatters in multiple directions, producing a softer, flatter appearance. Neither is better in absolute terms (a matte surface on a rustic bread or a rough-textured crumble is exactly right in context), but knowing which you’re working with, and why, means you can set your lighting to work with the surface rather than against it.
Browning changes a food’s surface chemistry and therefore its optical behaviour. The compounds produced during browning create a rougher, more complex surface than the pale, relatively smooth one beneath them. That complexity is part of why browned food catches light so interestingly — the texture creates micro-shadows and highlights at the surface level that add visual depth that no amount of post-processing can fully replicate on a pale, unbrownt surface.
Moisture also changes optical behaviour, which is why I think about whether a surface should be dry or slightly wet before a shot rather than leaving it to chance. A dry herb looks different from a lightly misted one: both can be right, but they look completely different in an image. A dry, roasted surface communicates crispness, while a moist one communicates freshness or heat.
Understanding that what you’re seeing through the lens is always the outcome of something happening at the food’s surface means you can intervene earlier in the process (before the camera is up, while the food is still being prepared) rather than trying to fix things visually at the styling stage.
Why this matters on set
Food styling is both a visual discipline and a scientific one, and the two aren’t separable in practice. Every decision made about how food is prepared, timed, handled, and presented before the camera arrives has a chemical or physical basis. Working with that (rather than around it or despite it) is what makes the difference between images that look nice and images that do their job.
Working with a food photographer who thinks this way
I’m Chiara, a food photographer and stylist, videographer, recipe developer, and social media specialist based in Dublin, with an MSc in chemistry, a certification in nutrition, and a diploma in digital marketing. I work with food, drink, and wellness brands across Ireland and internationally.
If you want your product or recipe shot by someone who understands it from the inside out (the science, the ingredients, the nutrition, and its story), get in touch using the button below.
