Cecina or Farinata

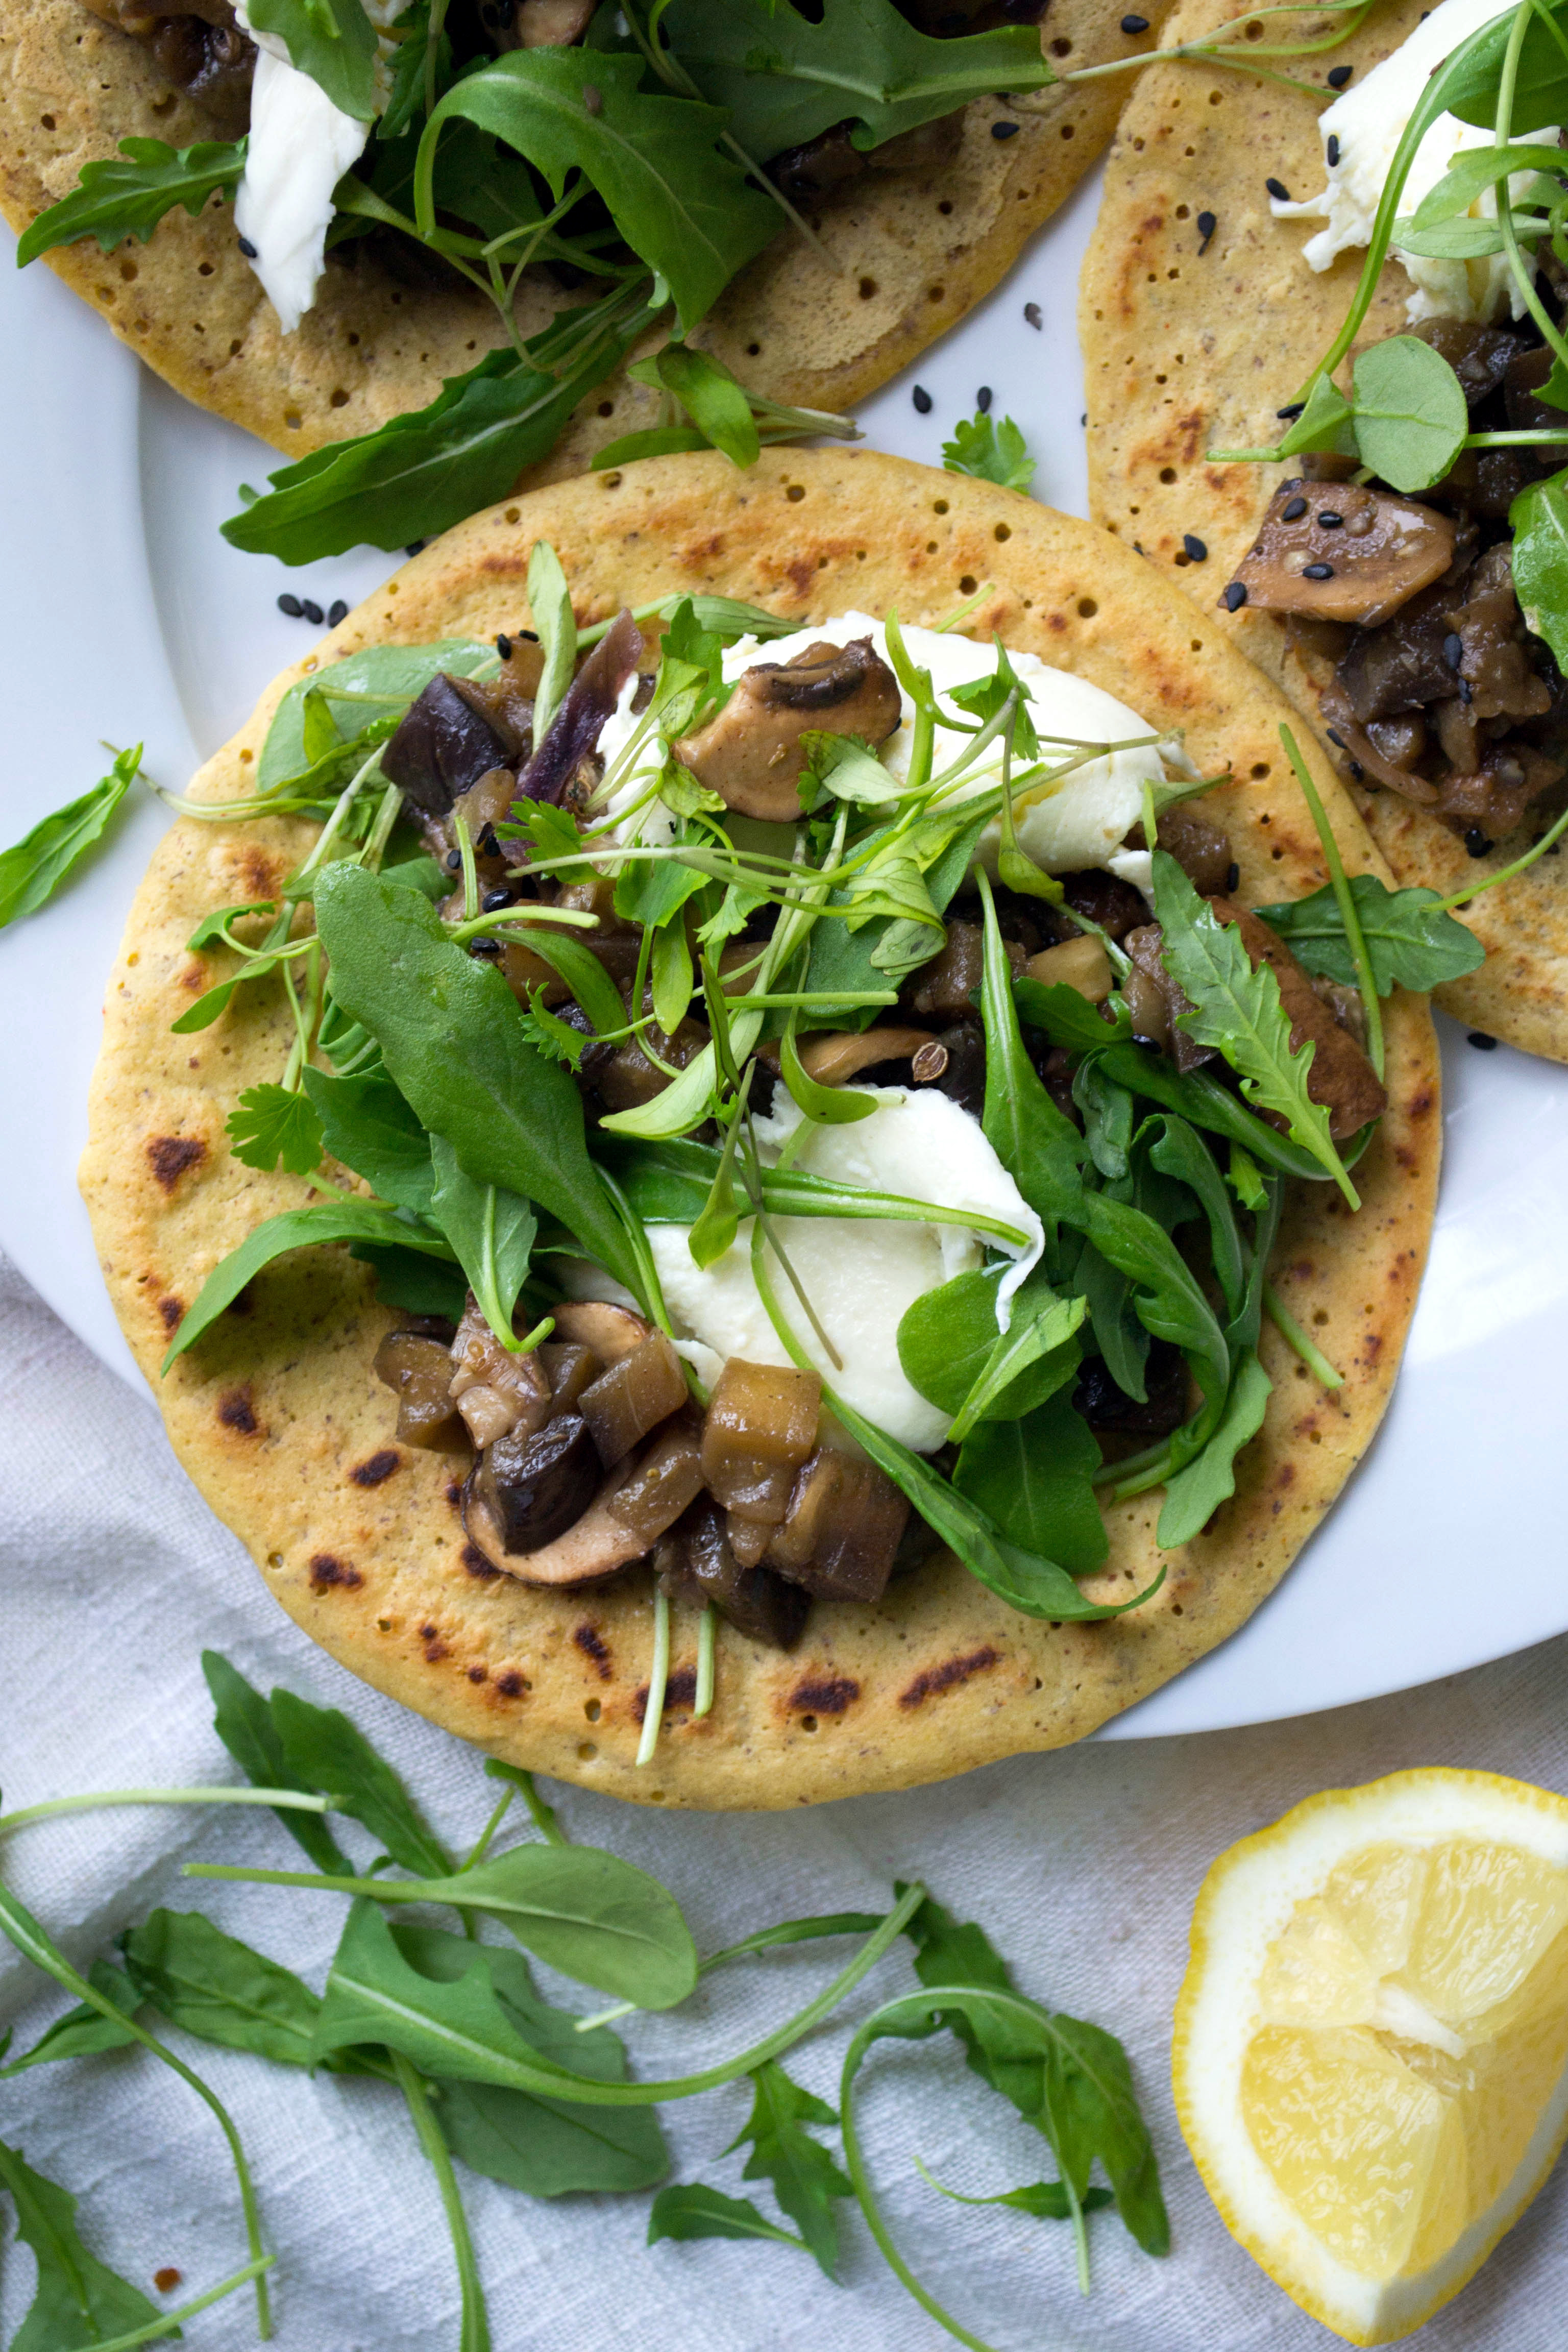
This is a typical Italian simple recipe (originally from Tuscany and Liguria, but you can find it in other parts of Italy as well). Just a few basic ingredients (chickpea flour, water, and extra virgin olive oil), paired together to give you this tasty result – great eaten straight from the oven, or reheated, or even cold. It’s a versatile food – good as a snack, or paired with a salad/soup for lunch, or as part of a savory breakfast… why not?

There was this little vegetarian and vegan cafè in between my house and the college in Bologna, and sometimes I was stopping by to grab something for lunch: almost every day they had freshly made super thin cecina and it was so good! Light and nourishing, perfect for a busy afternoon spent studying or working in the lab.

So, here there is my recipe for cecina. This is one of the recipes that I often share with my clients, it’s perfect when you are busy, but at the same time, you want to stay healthy and get your nutrients.

Cecina or farinata

DSC_0062 (2)

Cecina (or Farinata)

Ingredients:

  • 200 g chickpea flour
  • 500 ml water
  • 1 tsp ground black pepper (even better if it’s freshly cracked)
  • 3-4 tbsp extra virgin olive oil
  • a pinch of salt
  • fennel seeds, ground cumin or other spices (optional)

In a mixing bowl, add the water and spices, then slowly add the flour using a whisk to mix everything really well (to prevent lumps of flour). Leave to rest for at least 30 min, but even a couple of hours or overnight if possible (if you leave it to rest overnight you may (depending on the temperature of the room) have to add a little bit of water before baking since chickpea flour absorb water easily). Mix well again before baking and add 1 tbsp of olive oil. Place on a baking tray – the result should be thin, between 1-1.5 cm and 2-3 cm. You can use some baking paper or those reusable non-stick trays since tends to stick a lot to the pan – or you can add some oil on the bottom of a non-stick baking tray. Bake in a preheated oven at 180°C until there is a nice golden crust (a few minutes before taking it out from the oven, add on top some olive oil and spread it all over the surface, then put it back in the oven – that’s optional, but adds a nice extra flavor). Allow to cool well before removing from the pan (if you are using baking paper, remove the paper+food and place on a cooling rack). It will keep well in the fridge for 2-3 days.

You can prepare the plain version first, then try adding different spices to the mixture or spinach or carrots or courgettes, for example. If you add vegetables inside the batter, add them just before baking.

Alternatively, you can decide to top your cecina with some sauteed spinach or chard or kale or cavolo nero (any other similar dark green leafy vegetables will work well). Prepare your sautéed greens in a pan with a little bit of olive oil, chilli flakes or cayenne pepper, and black pepper – it will take a few minutes for them to be ready (chop them finely before or after cooking). You can also add some crumbled goat cheese or feta or chopped cashews for a dairy-free option. Try also this combination: yogurt, baked pumpkin, capers, and fresh thyme: delicious!

Chickpea and buckwheat tacos with marinated aubergines

These gluten-free tacos made from scratch are the perfect way to learn more about your taste buds and get creative with new flavors!

DSC_0170

Are chickpeas already part of your pantry? They are definitely a staple in mine and I usually try to stock up on both dry chickpeas and flour. If you are not used to cook with this kind of flour, give it a go! I love how food tastes when using chickpea flour, but I also really appreciate how it can be a handy option for a quick lunch.

What’s so special about chickpeas? They are high in fibre and protein (they have both soluble and insoluble fibre). This makes them a good ingredient not just for maintaining a healthy digestive system, but also to keep under control the levels of cholesterol and sugar in the bloodstream. They are especially rich in potassium, calcium, magnesium, iron, and vitamin B6. This composition makes chickpeas a great addition to the diet to help the body fighting stress (another reason to love them!).

These simple tacos are a great idea for a tasty lunch or dinner – you can easily change the preparation of the batter or the filling… to make them even more delicious, according to your taste buds! I can’t count how many times I’ve made them at home, and these are some of my favourite variations:

  • add mushrooms to the filling (simply cook them with the aubergines)
  • add milled flaxseeds to the batter (approx. 2 tbsp for the quantities written below)
  • add red cabbage on top of the aubergines: you can use it raw, with a splash of lemon juice or you can heat a little bit of olive oil in a pan, then add the red cabbage and stir for a couple of minutes, add the lemon juice and stir until there’s no liquid left. You can also use fermented red cabbage.
  • add some melted ghee in the batter (approx. 3/4 tbsp solid ghee for the quantities written below)
  • add rocket or other greens on top of the aubergines (for example microgreens)
  • add mozzarella instead of feta or goat cheese (I would use approx. 40-50 g of mozzarella for each person)

Hope you will like them as much as I do, and don’t forget to get creative while cooking!

DSC_0165
DSC_0097.jpg

Chickpea and buckwheat tacos with marinated aubergines

Ingredients:

  • 8 tbsp chickpea flour
  • 8 tbsp buckwheat flour
  • water
  • 2 medium-sized aubergines
  • 1 tsp extra virgin olive oil
  • 1-2 tbsp tamari
  • 1/2 tsp dried thyme
  • 1/3 tsp garam masala
  • 1/3 tsp ginger powder
  • a pinch of cayenne pepper
  • approx. 50 g feta or goat cheese (use chopped cashews for a dairy free option)

To make the batter: in a medium-sized bowl, mix the 2 flours and enough water to get a batter similar to one for pancakes – mix well. Let it rest for 5-10 min. Stir until there are no lumps. Add more liquid if needed. Heat a frying pan, preferably a non-stick one, on a medium heat with ½ tsp of ghee or olive oil (find here the recipe for ghee). Use 2 tbsp for each taco, moving the pan until the batter is evenly distributed. Cook each taco until it can be easily flipped with a spatula.

To make the marinated aubergines: mix spices, olive oil, and tamari with the finely chopped vegetables. Massage with your hands for a couple of minutes. Let it rest for 20-30 min. in the fridge. Heat a pan and then add the aubergines, cook for approx. 5 min.

Add some aubergines inside each taco, then add the other fillings on top of them (this amount of aubergines will make the filling for 2 people – I usually consider approx. 3 small tacos for each person, prepare more of them and keep in the fridge for 2-3 days).


Would you like to get my help in setting up solid foundations for a diet and lifestyle that are a real support for your well-being? Take the first step today – book your first FREE CONSULTATION with me here:

BOOK NOW

Ghee

Have you ever read about liquid gold? It’s one of the common ways used to talk about ghee, one of the cornerstones of Ayurveda (Indian traditional medicine). The use of ghee for cooking, Ayurvedic treatments, or as part of ceremonies is well-established in the Indian culture (but also in other countries). The Sushruta Samhita, a compendium on medicine and an Ayurvedic classic text, talks about ghee claiming that’s beneficial for the whole body and associates its use as a remedy for issues related to the pitta dosha, such as inflammation.

But what is ghee and how does it differ from butter? Butter is an emulsion, it contains a fat component, water and milk proteins (emulsifiers). Ghee, also known as clarified butter, is obtained by heating the butter with separation of milk solids (casein, lactose): what remains is a golden liquid that will solidify when cool. The high heat applied to butter removes moisture. Chemically, ghee is a complex lipidic mixture made of glycerides, free fatty acids, phospholipids, sterols, sterol esters, fat-soluble vitamins, carbonyls, hydrocarbons, carotenoids (the quantity depends on the milk used), small amounts of casein and traces of minerals such as calcium or phosphorus. Approx. 98% of the ghee’s composition are glycerides, while sterols (mostly cholesterol) is usually the 2-5% of total material. Typically, ghee has a higher smoke point than butter (approx. 250°C vs 150°C), so it’s ideal for cooking at high temperature. Ghee as also the ability to give a unique flavour to preparations such as curry, dahl, soups, and it’s useful in baking.

  • Obviously, ghee remains a fat source, so it should be considered in the total daily fat intake, used in limited amounts and appropriately (especially for people who suffer from high cholesterol or related diseases).
  • If ghee is prepared properly, there should be just traces of casein and lactose so it can be suitable even for people who are dairy intolerant, unless a person is extremely sensitive (discuss with your GP if you have any concerns about allergic responses).
  • Since moisture is largely removed, ghee is shelf-stable: you can store it in the fridge, but it’s safe even if you keep it outside in an airtight container. In India, aged ghee is considered to have even more healing properties than the freshly made one (even 100-years old ghee): it’s used externally for therapeutic treatments by Ayurvedic practitioners.
  • Ghee contains vitamins such as A (that has an important role in different metabolic processes, assists in protein absorption and contributes in slowing the ageing process), E (with antioxidant properties), K (that stimulates bone growth/repair and plays a role in blood health).
  • Ghee is rich in short, medium and long-chain fatty acids, both unsaturated and saturated. Ghee contains omega 3 and omega 9 essential fatty acids. It’s also one of the highest natural sources of CLA (conjugated linoleic acid), especially when made from organic butter and grass-fed cow’s milk. Ghee contains also phenolic antioxidants, good for the immune system.
  • Traditionally, ghee has been used especially to aid digestion and for keeping connective tissues and joints healthy.

That’s interesting: a research group studied the antioxidant activities of orange peel extract in ghee stored at different temperatures. The study revealed that orange peel could be a good natural source of antioxidants which can be used in fat-rich food products like ghee to retard the process of oxidative deterioration.

How to prepare ghee?
Ghee is often available in health food stores, but you can make it at home easily. Use preferably organic and unsalted butter. Ghee can be made starting with different kind of milk (traditionally in India is made with buffalo’s milk).

Cut the butter into small cubes and place it in a saucepan over low heat until completely melted. Heat for about 10-15 min. You will notice the separation of white curds that will start to collect at the bottom of the pan. The melted butter will pass through different stages such as foam, bubbles, and then foam again: at this stage the ghee is ready. You should have a bright golden liquid and milk solids. Let it cool for few minutes and then filter the liquid through a cheesecloth. Allow to cool completely and solidify before closing the jar.

dsc_1052

References:

Ghee: Its Chemistry, Processing and Technology
Ghee: An Ayurvedic and Biochemical Treatise


Would you like to start having a healthier diet and lifestyle, but also start building lifelong healthy habits? Need help to get started? Click on the button below:

I’M READY!


Orange flavoured Granola

(read in Italian)

Years ago, one of the very first things that I have started making at home from scratch on a regular basis has probably been granola, since I was often not completely satisfied with the shop-brought options. It’s quick and easy to make but it’s also a good way to get more creative in the kitchen.

Nowadays, I don’t make my own granola every week since we like to change what we eat for breakfast and just be creative following our body needs and what’s in season, but every time it’s always a pleasure having some freshly made granola and being able to decide what to put inside.

Another good reason to choose it as the first recipe: granola is related to a few memories that make me smile every time… the slow mornings with crunchy granola, freshly made yogurt, and fruit shared with my boyfriend while on holiday in the north of Italy… or a friend of mine who started making her own granola after hearing from me about it all the time – she even made granola while she was expecting her first baby girl, texting me saying that one day it will be a great family activity!

Do you have any special story related to making your own granola? Stop by on my Instagram page and let me know! Chiara x

ORANGE FLAVOURED GRANOLA

  • 100 g rolled oats (choose the gluten-free option if needed)
  • 150 g millet flakes
  • 10-12 dates, finely chopped (6-7 if using Medjool dates)
  • juice of 1 orange, freshly squeezed
  • 2-3 tbsp of coconut flour (or 1 handful of coconut chips)
  • 1 handful of almonds, finely chopped
  • 3 tbsp pumpkin seeds, finely chopped
  • 3 tbsp milled flaxseed
  • 1 tbsp date syrup (optional)
  • 1 tbsp coconut oil, melted (measured solid)
  • 1 tsp ginger powder
  • 1 tsp cinnamon powder
  • 1 pinch of grated nutmeg
  • a pinch of salt
  • lukewarm water (approx. 6-7 tbsp)

In a bowl, combine oats, millet flakes, dates, spices, coconut oil, and some lukewarm water (you will need enough water to combine together all the different ingredients but you don’t want to create just one big piece of granola). Use your hands to mix all the ingredients. To bake your granola, use a baking tray with some parchment paper or opt for a reusable baking mat. Spread the granola on the baking tray making an even layer and cook it in a preheated oven at 180°C for approx. 10-15 minutes.

Take the baking tray out from the oven, spread the orange juice all over the granola, and mix well with a spoon. Place it in the oven at the same temperature for 5-10 minutes.

Once again take out from the oven, add almonds, pumpkin seeds, coconut flour (or chips), and the date syrup (if you’re using it): mix well and place in the oven for just a couple of minutes (the coconut chips tend to burn quickly).

When the granola will be ready, add the milled flaxseeds and mix well. Allow your granola to cool completely before putting it in a container. Use it for breakfast or as a snack with fresh fruit and yogurt or kefir (it’s also delicious paired with milk or a plant-based drink).

When oranges are not in season, you can decide to add some vanilla to the same recipe for a different flavor or use a couple of tablespoons of dark chocolate chunks (or both! Vanilla and chocolate is always a winning combination).


Would you like to bring more awareness into your days and let intuition play a real role in your life? Click on the button below to learn how to do it using a simple, effective, and enjoyable 7-step program

LEARN MORE