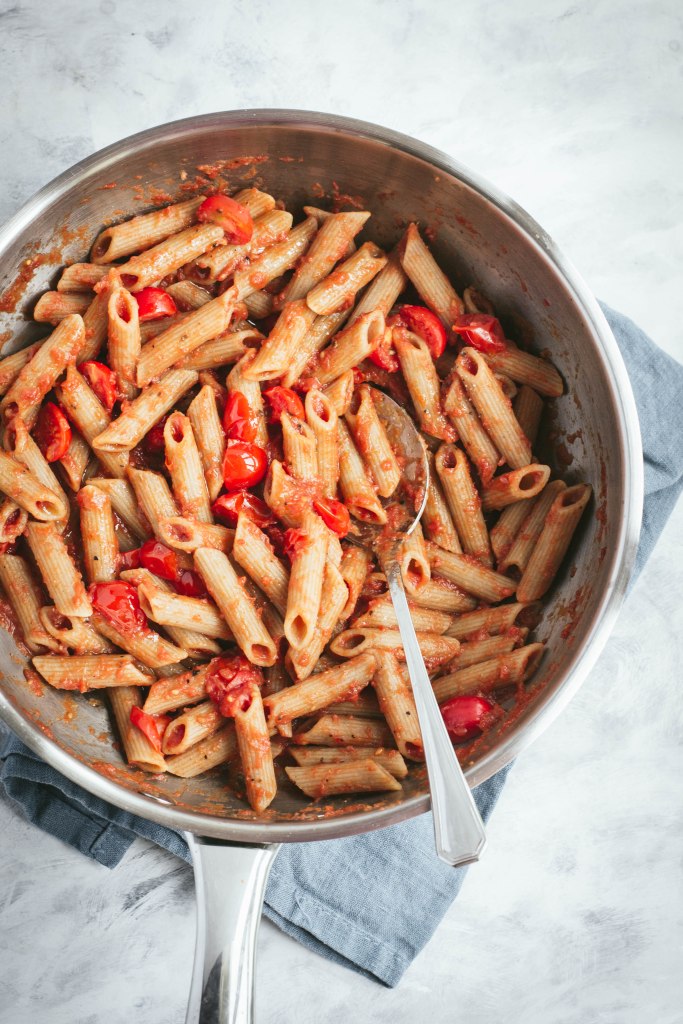
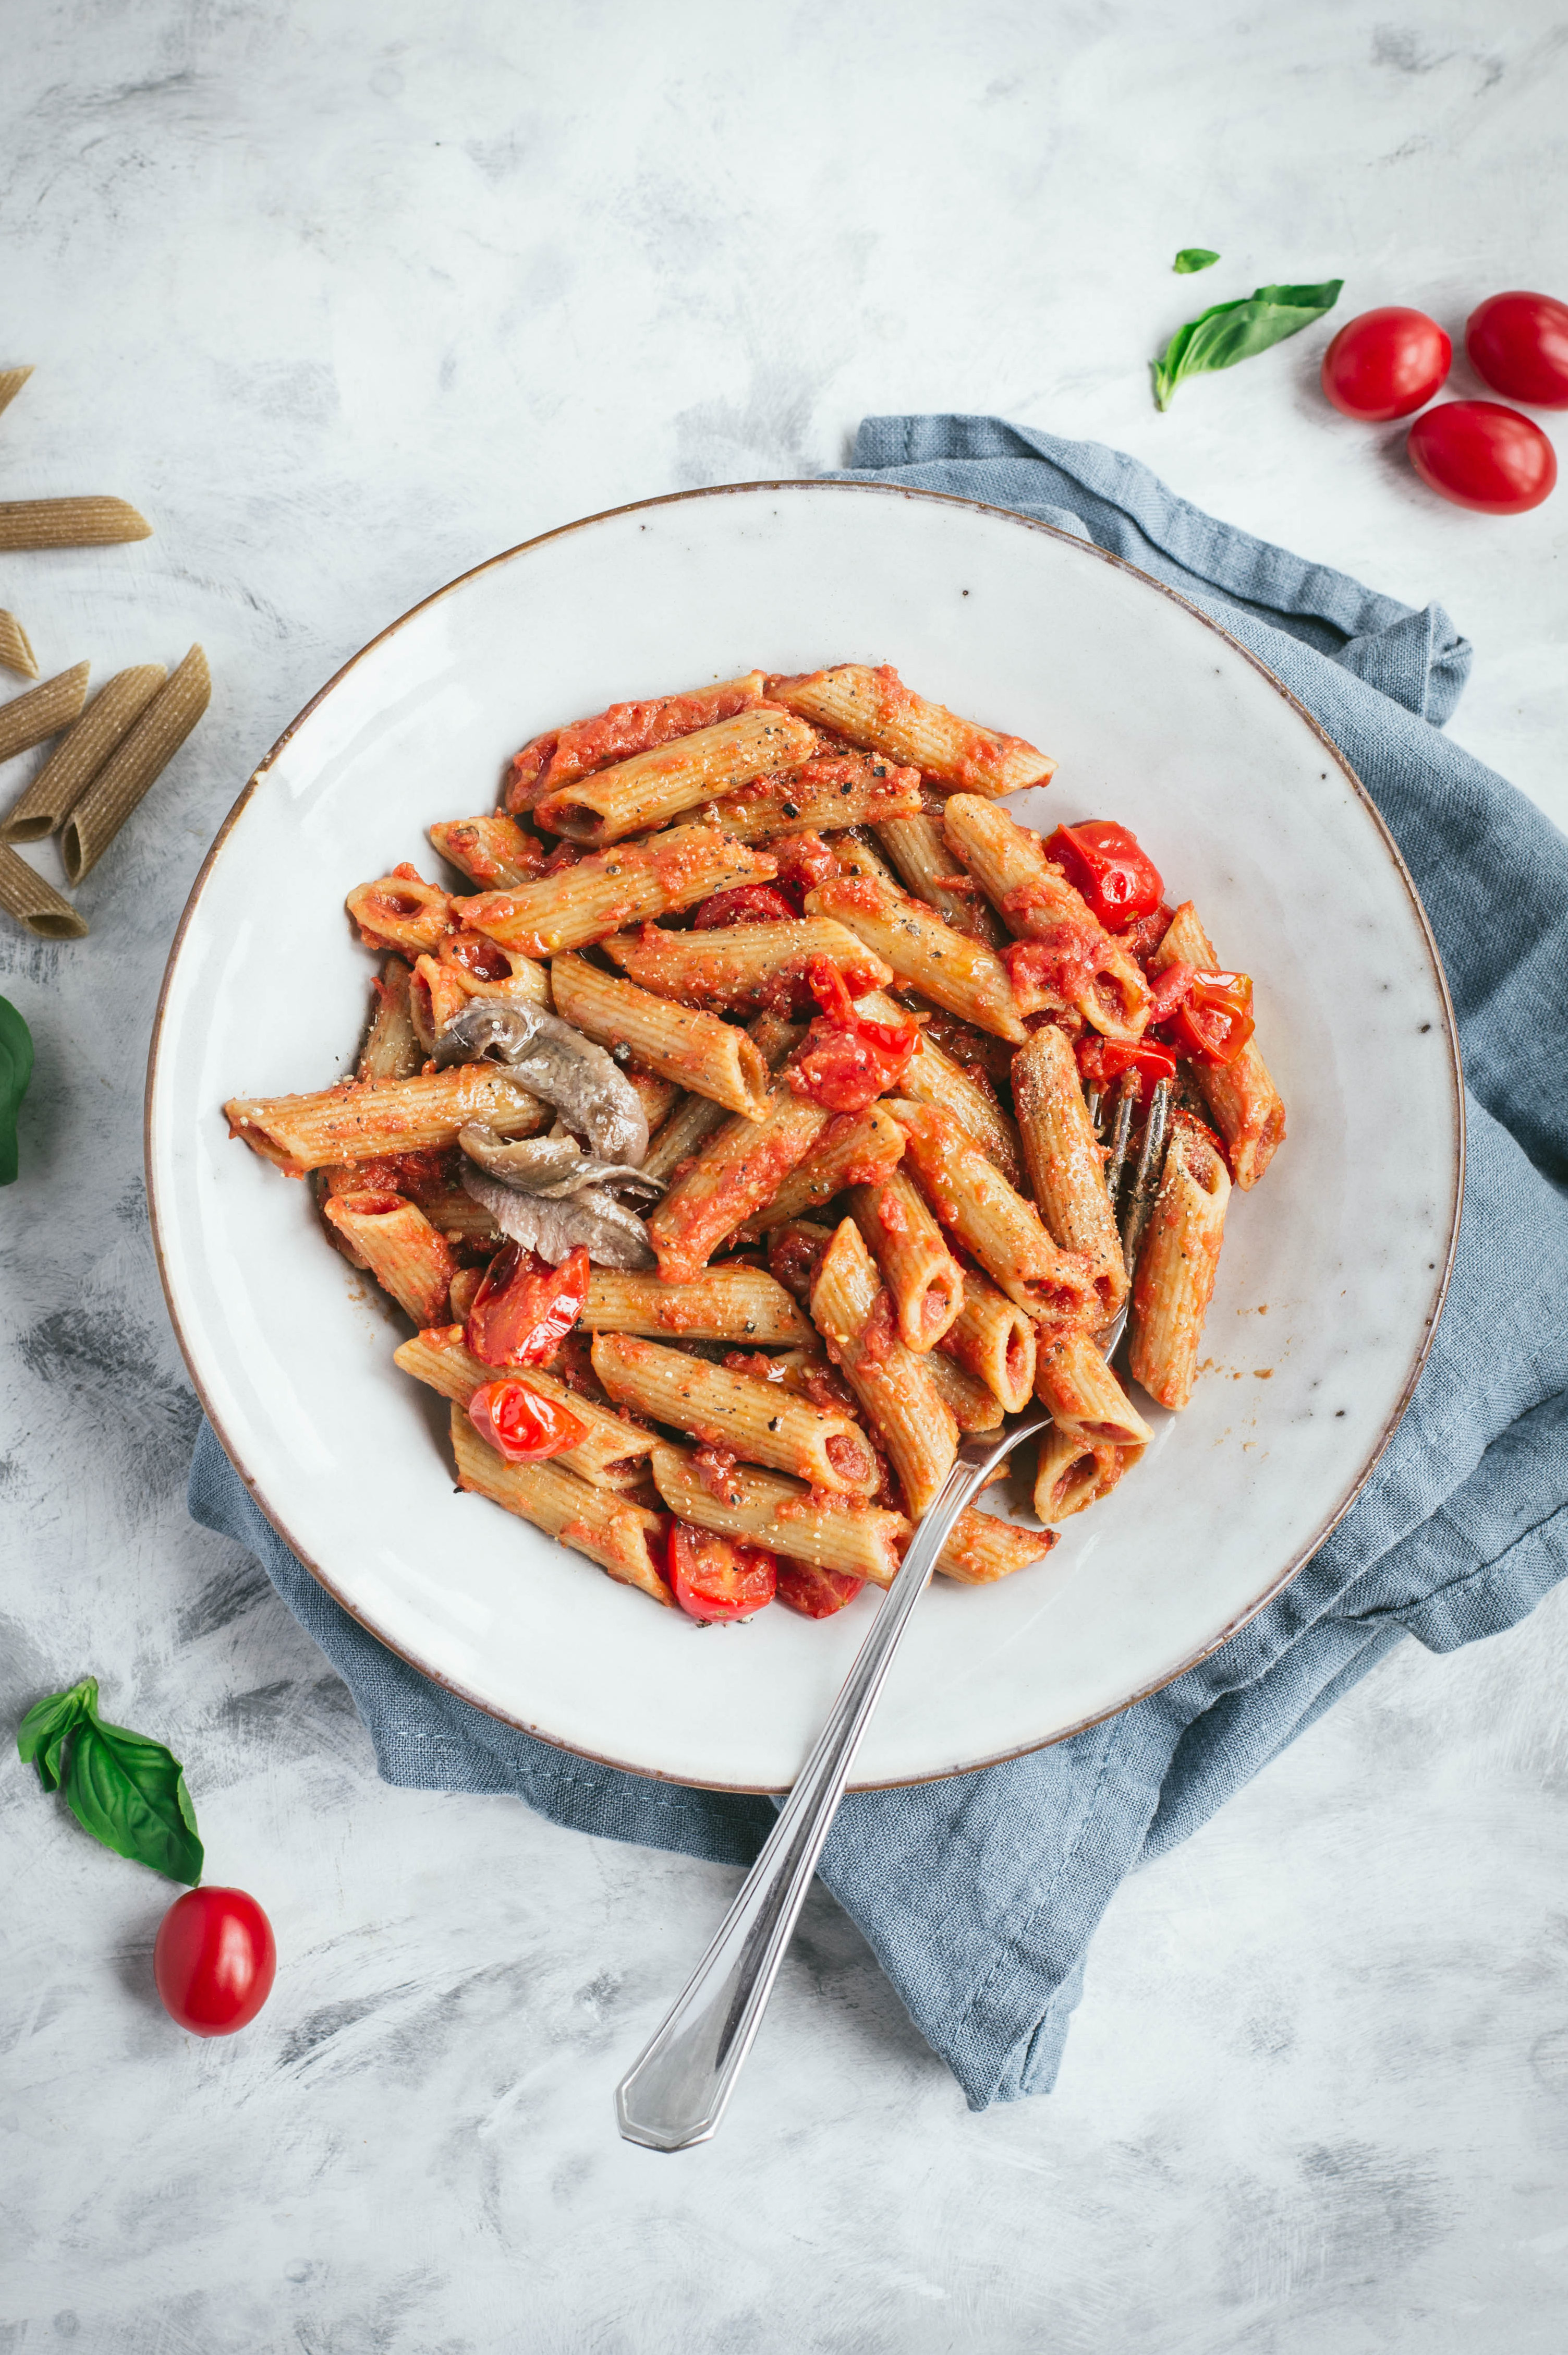
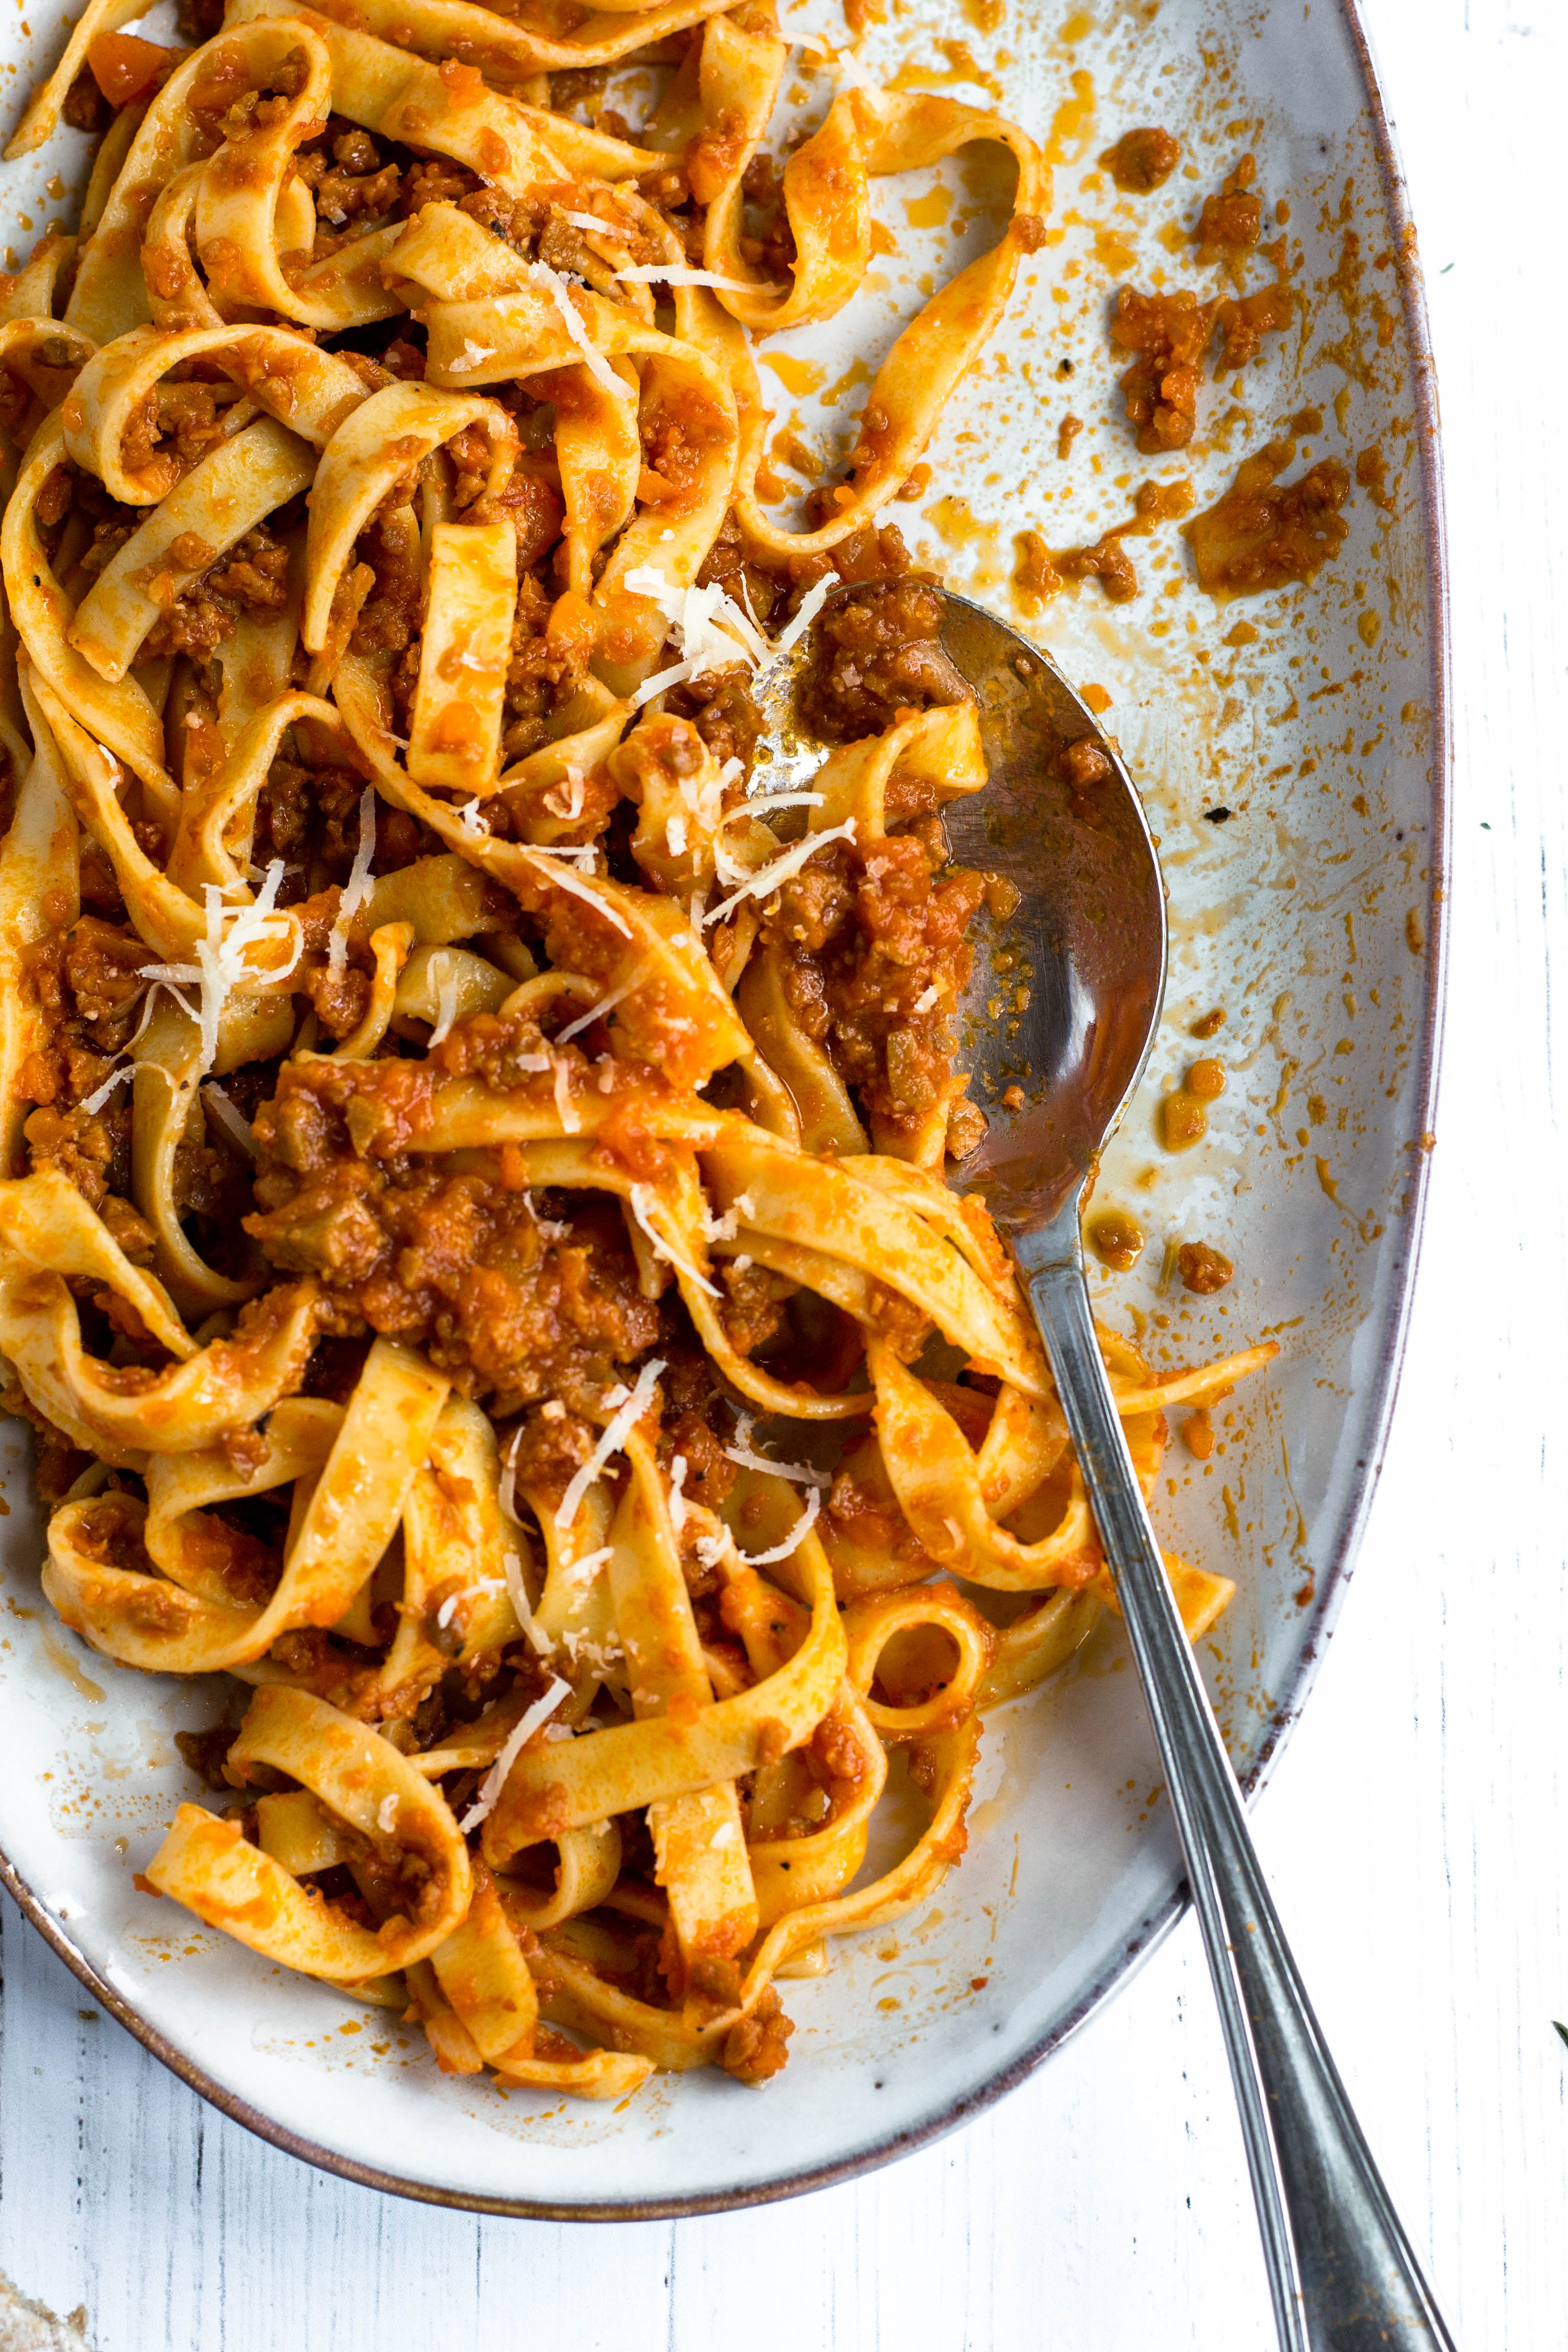
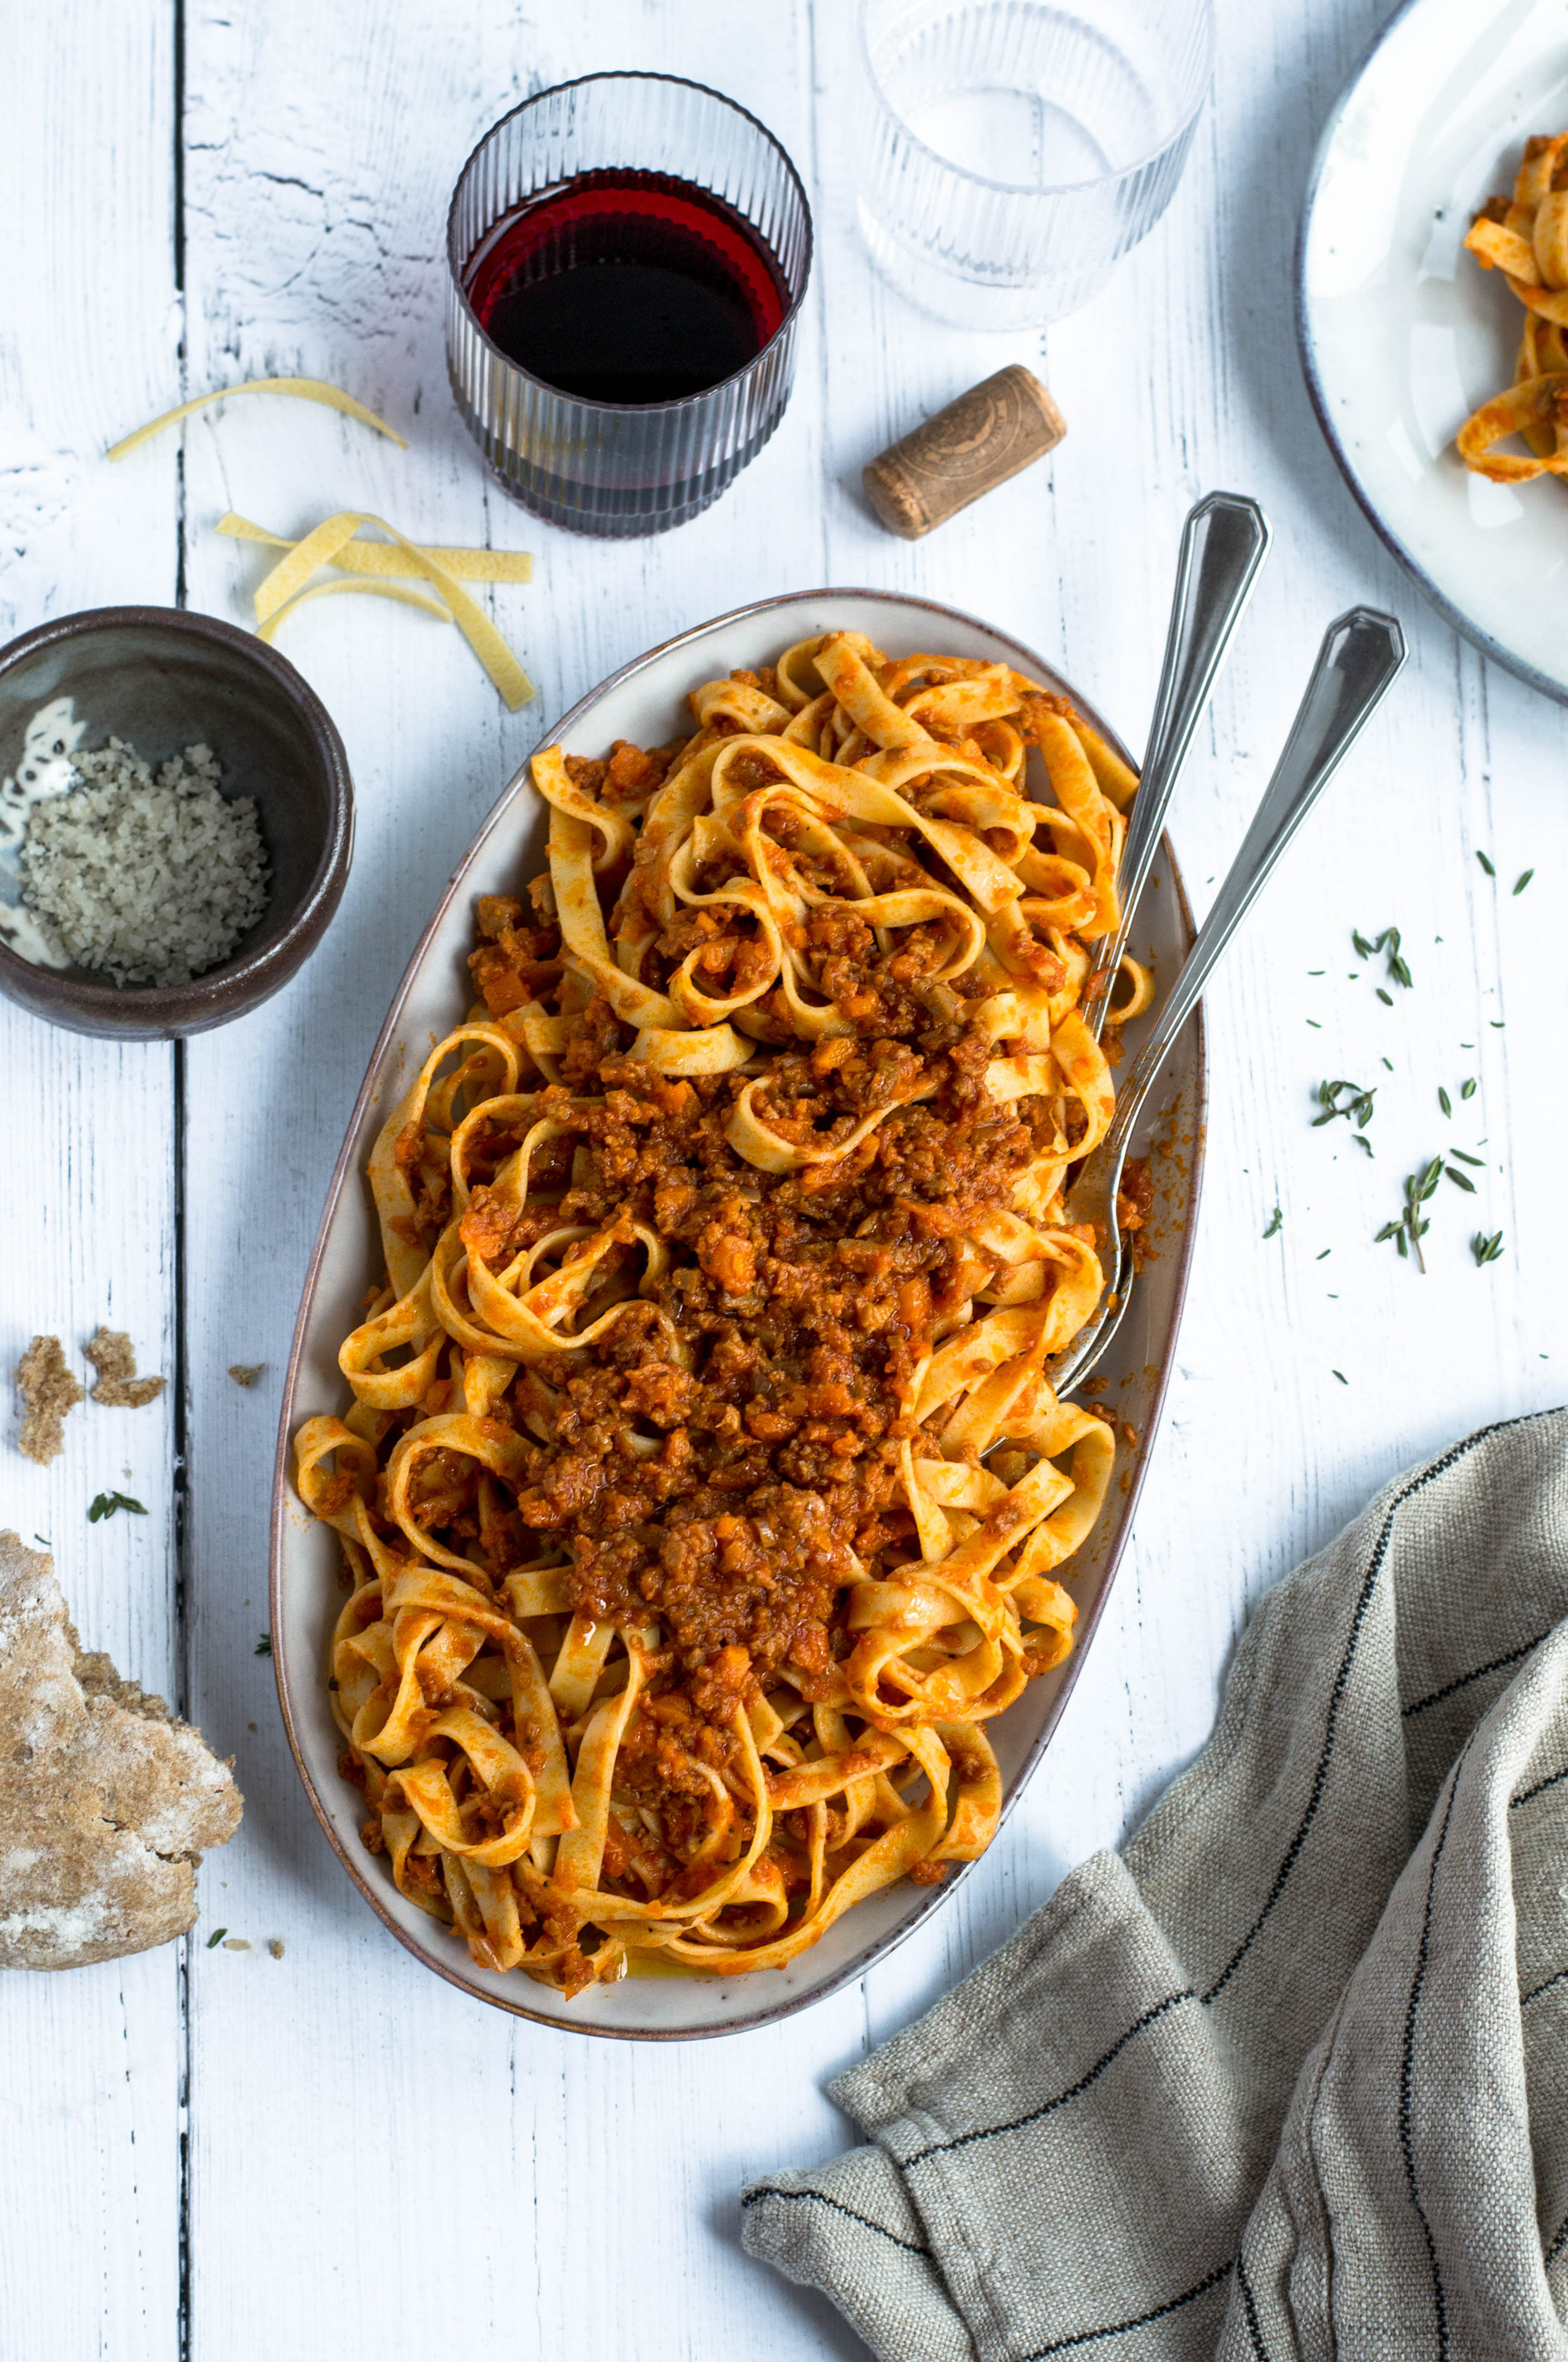
The ultimate Summer sandwich

(read in Italian)

This vegetarian sandwich has a lovely combination of most of the typical Summer flavours and it gets all the extra points for being super easy to make. Featuring seasonal ingredients such as tomatoes, red peppers, aubergines, and a good handful of fresh thyme, it perfectly embraces my philosophy “get the most out of each season”.

This vegetarian sandwich has a lovely combination of most of the typical Summer flavours and it gets all the extra points for being super easy to make! Featuring seasonal ingredients such as tomatoes, red peppers, aubergines, and a good handful of fresh thyme, it perfectly embraces my philosophy of "get the most out of each season". You can also easily adapt this sandwich to your needs using, for example, some gluten-free bread or a dairy-free mozzarella. Recipe on amatterofnourishment.com

Good quality bread, extra virgin olive oil, and fresh seasonal ingredients are the key to getting this recipe right. It’s a simple dish that tastes like Summer; it has a hint of Mediterranean flavours and is a bit messy, exactly as you would expect from the most delicious sandwiches. If you have ever tried a Catalonian dish called Pan con tomate or Pa amb tomàquet (bread with tomatoes), you’ll be happy to know that the external layers of this sandwich somehow remind its deliciousness (Pan con tomate is not made with sliced or finely chopped tomatoes like bruschetta or an open toast – instead, it’s made with their pulp).

In my mind, Summer always goes hand in hand with fresh ripe tomatoes and I would use them to brighten up basically everything from pasta to a savoury breakfast but in this recipe I’ve decided to use tomato passata (one of my pantry’s staples). The idea of adding a layer of tomato passata on the bread (like you would do with mayonnaise, hummus or another sauce in a regular sandwich) can be used all year long and it’s a good way to pair a bit of Summer with the vegetables typically found in Autumn and Winter (get creative and then let me know how it goes).

Choose some sourdough bread or a similar rustic loaf (even better if it’s a whole grain option) that will balance the veggies with its earthy flavours. You could potentially use ciabatta or milk bread but the result won’t be the same.

When you place the sandwich in the pan or in the oven to toast the bread and melt the mozzarella, adjust the time according to your preferences. After trying this recipe a few times, I would say the best time to remove the sandwich from the pan/oven is when the bread is just a bit crunchy and the cheese is not fully melted. You can also easily adapt this sandwich to your needs using, for example, some gluten-free bread or dairy-free mozzarella.

WHAT EQUIPMENT DO YOU NEED FOR THIS RECIPE?

  • chopping board
  • baking pan to cook the veggies
  • non-stick pan to toast the sandwich
This vegetarian sandwich has a lovely combination of most of the typical Summer flavours and it gets all the extra points for being super easy to make! Featuring seasonal ingredients such as tomatoes, red peppers, aubergines, and a good handful of fresh thyme, it perfectly embraces my philosophy of "get the most out of each season". You can also easily adapt this sandwich to your needs using, for example, some gluten-free bread or a dairy-free mozzarella. Recipe on amatterofnourishment.com

THE ULTIMATE SUMMER SANDWICH

Ingredients (makes 2)

  • 4 slices of bread (quite thick)
  • 2 medium-sized aubergines
  • 1 medium-sized red bell pepper
  • 6-8 tbsp tomato passata
  • 1 small handful of fresh thyme
  • a pinch of black pepper
  • a pinch of salt
  • extra virgin olive oil

Method (takes 25-30 minutes)

Prepare the slices of aubergines and red pepper: roast them in the oven at 180°C for approx. 15 minutes with a drizzle of olive oil and a pinch of black pepper and salt or opt for grilled veggies. Slice up your bread and spread the tomato passata on all the internal layers (you’ll need approx. 2 tbsp for each slice but it depends on the exact size of your bread). Then add the other ingredients: start with some aubergines, followed by the red pepper, mozzarella, thyme, black pepper, and olive oil – add more aubergines to finish off your sandwich.

For some extra flavour, add a drizzle of olive oil to the external layers of the sandwich. Now you can toast the sandwich on a preheated non-stick pan or place it in a preheated oven at 190°C. Cook for approx. 5 minutes or until crispy and golden on the outside. Don’t let the mozzarella melt completely otherwise, the sandwich will be too soggy. Serve warm.

If you liked this post, share it with your friends using the buttons below.

Crema di fagioli cannellini e lenticchie

(read in English)

Questa crema vegana creata con fagioli cannellini e lenticchie necessita di pochi ingredienti selezionati e si prepara in 5 minuti! La ricetta è caratterizzata dall’incontro tra dei sapori ricchi e la freschezza dello zenzero, dell’olio d’oliva e del succo di limone.

This vegan white bean and lentil dip is made with simple ingredients and it will be ready in just 5 minutes! Recipe on amatterofnourishment.com

Un hummus classico preparato con ceci e tahini è un’ottima scelta sia in termini di nutrienti che di sapore, ma cercare di portare in tavola più varietà è sempre un fattore importante, quindi è utile sapere che si possono creare anche tante altre creme buonissime con diversi legumi ed altri ingredienti.

Le salse o creme di questo genere sono facili da preparare e da riadattare in caso dovessero mancare uno o due ingredienti. Sia che tu scelga di preparare un hummus, del guacamole, o una salsa all’avocado, accompagna il tuo mix cremoso con della verdura cruda, delle patate arrosto, del pane tostato o i tuoi crackers preferiti ed usa quest’occasione per preparare un bel piatto colorato da condividere con i tuoi amici (o anche solo qualcosa di speciale per te!).

I cannellini (ed i legumi in generale) sono ricchi di nutrienti e relativamente economici: sono molto pratici per introdurre più proteine vegetali, fibre e minerali nella tua alimentazione. Puoi trovare facilmente i fagioli secchi nei negozi e farli diventare uno degli ingredienti di base della tua dispensa (ancora meglio se hai la possibilità di comprarli sciolti in modo da ridurre gli imballaggi ed abbracciare uno stile di vita un po’ più “zero waste”). Lascia i fagioli in ammollo per almeno 8-9 ore prima di cuocerli e conservali in frigorifero per 3-4 giorni con la loro acqua di cottura.

Per questa crema di fagioli fatta in casa, puoi usare sia i cannellini che i bianchi di Spagna: entrambi hanno una consistenza farinosa ed un sapore caratteristico che ricorda un po’ la frutta secca. Questo tipo di fagioli è uno dei miei preferiti: non hanno bisogno di tanti altri ingredienti per creare un piatto ricco di gusto ed è facile abbinarli a tanti diversi tipi di verdura (provali in insalata con i pomodori o caldi preparati con della verdura a foglia verde scura!). In aggiunta ai fagioli, questa salsa contiene anche qualche cucchiaio di lenticchie rosse: l’ingrediente perfetto per renderla ancora più cremosa e per darle un gusto più deciso.

This vegan white bean and lentil dip is made with simple ingredients and it will be ready in just 5 minutes! Recipe on amatterofnourishment.com

CREMA DI FAGIOLI CANNELLINI E LENTICCHIE

Ingredienti:

  • 250 g di fagioli cannellini cotti (o bianchi di Spagna)
  • circa 2-3 cucchiai di lenticchie rosse decorticate cotte
  • 2 cucchiai di tahini (crema di semi di sesamo)
  • succo di 1 limone
  • 1 cucchiaino di zenzero fresco grattugiato (o 3/4 di cucchiaino di zenzero in polvere)
  • un pizzico di curcuma in polvere
  • un pizzico di sale (opzionale)
  • alcuni cucchiai di acqua fredda (o puoi usare l’acqua di cottura dei fagioli)
  • olio extra vergine d’oliva

Per preparare questa crema di fagioli fatta in casa, tieni a mente le linee guida che ho condiviso parlando della preparazione dell’hummus: sarà decisamente più cremosa utilizzando un po’ di acqua di cottura, un pizzico di bicarbonato di sodio e dei fagioli cotti leggermente oltre il punto di cottura ideale.

Usa un frullatore o un robot da cucina – aggiungi l’acqua in piccole quantità passo dopo passo, controllando la consistenza della crema. Aggiungi la tahini come ultimo ingrediente, quando avrai già ottenuto un composto cremoso. Puoi adattare le spezie ed la quantità di succo di limone in base ai tuoi gusti e fare lo stesso per gli ingredienti extra da aggiungere sopra. Questa crema vegana si sposa molto bene con un filo d’olio extra vergine d’oliva ed un po’ di prezzemolo fresco.

Se questo post ti è piaciuto, condividilo con i tuoi amici usando i link qui sotto. Non dimenticare di taggarmi @amatterofnourishment su Instagram se provi questa ricetta: mi piacerebbe molto vedere le tue creazioni!

Silky white bean and lentil dip

(read in Italian)

This vegan white bean and lentil dip is made with simple ingredients and it will be ready in just 5 minutes! The recipe is characterised by the combination of earthy flavours with the freshness of ginger, olive oil, and lemon juice.

This vegan white bean and lentil dip is made with simple ingredients and it will be ready in just 5 minutes! Recipe on amatterofnourishment.com

While a classic hummus with chickpeas and tahini is a great choice in terms of both nutrients and taste, it’s important to learn how to bring a variety of foods on our table, so knowing you can create plenty of other delicious dips with different legumes and combinations can be useful.

Dips are generally simple to make and easy to adapt if one or two ingredients are missing. Whether your choose hummus, guacamole, or a creamy avocado sauce, pair your dip with raw veggies, roasted potatoes, toasted bread or your favourite crackers and use it as a chance to create a lovely shared platter for your friends (or even just for yourself!).

White beans (and legumes in general) are packed with nutrients and inexpensive: a practical way to include more plant-based protein, fibre, and minerals into your diet. You can easily find dry beans in the shops and turn them into one of your kitchen’s staples (even better if you can buy them in bulk, to reduce packaging and embrace a more “zero waste” lifestyle). Soak the dry beans for at least 8-9 hours before cooking and store them in the fridge for 3-4 days with their cooking water.

For this homemade dip, you can use either cannellini or butter beans: they both have a floury texture and a characteristic nutty taste. White beans are among my favourites: they don’t need much to create a flavourful meal and it’s easy to combine them with many different vegetables (definitely try white beans with tomatoes or green leafy vegetables!). In addition to white beans, this dip contains a few tablespoons of cooked red lentils: the perfect extra ingredient to get a smoother finish and a stronger earthy flavour.

This vegan white bean and lentil dip is made with simple ingredients and it will be ready in just 5 minutes! Recipe on amatterofnourishment.com

SILKY WHITE BEAN AND LENTIL DIP

Ingredients:

  • 250 g cooked cannellini beans (or butter beans)
  • approx. 2-3 tbsp cooked red lentils
  • 2 tbsp tahini (sesame seed paste)
  • juice of 1 lemon
  • 1 tsp freshly grated ginger (or 3/4 tsp ground ginger)
  • a pinch of turmeric
  • a pinch of salt (optional)
  • a few tbsp of cold water (or you can use the cold cooking water from the beans)
  • extra virgin olive oil

For the preparation of this homemade bean dip, keep in mind the guidelines I’ve shared for hummus: it will turn out smoother if you use some of the beans’ cooking water, a pinch of bicarbonate of soda, and slightly overcooked legumes.

Use a blender or a food processor – add the water in small portions step by step based on how the dip looks like. Add the tahini as the last ingredient when you already have your creamy mixture. Adjust the spices and lemon juice to your preferences and do the same for the toppings. This plant-based dip it’s naturally gluten-free and it pairs really well with some good quality extra virgin olive oil and a bit of fresh parsley.

If you liked this post, share it with your friends using the buttons below! Don’t forget to tag me @amatterofnourishment on Instagram if you try this recipe: I’d love to see your creations!

Pasta con passata di pomodoro, datterini ed acciughe

(read in English)

Pasta, pomodori, acciughe, spezie ed olio extra vergine d’oliva: la ricetta di un sugo per la pasta senza troppe pretese e l’ennesima conferma che pochi ingredienti semplici e di qualità sono più che sufficienti per creare un ottimo piatto.

A delicious pasta sauce with tomato passata, fresh baby plum tomatoes, and anchovies. Ready in less than 10 minutes! Recipe on amatterofnourishment.com

Mi piacciono le ricette semplici da preparare, che hanno un lista di ingredienti ragionevole e che includono alcuni dei prodotti che ho a quasi sempre a disposizione nella mia dispensa; ancora meglio se sono anche piatti ricchi di nutrienti. Questo sugo per la pasta fatto in casa ha tutte queste caratteristiche e con la sua semplicità conquisterà anche i palati più esigenti.

Aggiungere ingredienti come fagioli, ceci, o lenticchie nel sugo della pasta è un modo pratico e veloce per aumentare il contenuto di nutrienti di un pranzo o di una cena; il pesce (specialmente quello azzurro o altro pesce ricco di omega-3 come trota o salmone) può essere un’altra valida opzione.

ALCUNI DETTAGLI SU QUESTO SUGO:

  • LE ACCIUGHE: sono un ottimo ingrediente da aggiungere alla pasta o sulla pizza non solo in termini di gusto ma anche per ciò che riguarda i nutrienti. Un pesce azzurro dal sapore deciso, ricco di acidi grassi omega-3, niacina e selenio.
  • I POMODORI: se segui questo blog e le mie pagine social da un po’, ormai sai che sono una grande sostenitrice dello scegliere il più possibile frutta e verdura di stagione. Questa ricetta è un ottimo modo per utilizzare i pomodori maturi durante l’Estate – nello specifico, se riesci a trovarli, scegli i datterini, dato che i pomodori ciliegino non sono assolutamente la stessa cosa. I datterini sono sempre la mia prima scelta in abbinamento con la pasta: sia che si decida di usarli a crudo, arrostiti, o saltati in padella, non si rimane mai delusi dalla loro consistenza o dal loro caratteristico sapore. Quando i datterini non sono disponibili, puoi sostiturli con dei pomodori secchi: non c’è bisogno di re-idratarli prima di utilizzarli in questa ricetta, visto che questo passaggio avviene durante la preparazione del sugo.
  • LA PASTA: per un risultato ottimale, usa una pasta corta. Qui io ho utilizzato delle penne integrali, ma anche i fusilli o dei rigatoni sono altre ottime opzioni. Quello che cerchi è una pasta con una superficie ruvida in grado di accogliere al meglio il tuo sugo!
A delicious pasta sauce with tomato passata, fresh baby plum tomatoes, and anchovies. Ready in less than 10 minutes! Recipe on amatterofnourishment.com

PASTA CON PASSATA DI POMODORO, DATTERINI ED ACCIUGHE

Ingredienti (per 2 persone)

  • 160 g di pasta integrale
  • 200 ml di passata di pomodoro
  • 100 g di datterini
  • 8-10 acciughe
  • 1/3 di cucchiaino di pepe nero (meglio se macinato fresco)
  • 1 pizzico di pepe di cayenna
  • 3-4 foglie di basilico fresco o menta
  • olio extra vergine d’oliva

Cuoci la pasta in acqua bollente seguendo le istruzioni sulla confezione. Nel frattempo, prepara il sugo: in una padella mischia le acciughe spezzettate, la passata di pomodoro, 3/4 del totale dei datterini (tagliati a metà) e le spezie. Scalda il sugo ed aggiungi un po’ d’acqua di cottura della pasta mentre lo prepari (solo 1 o 2 cucchiai alla volta, visto che il sugo alla fine dovrà essere cremoso e non liquido). Il tempo di cottura della pasta è più che sufficiente per preparare il sugo. Quando la pasta sarà cotta, aggiungila (senza acqua in eccesso ed al dente) al sugo – includi anche il resto dei datterini (tagliati a metà) e fai saltare il padella per circa 30 secondi. Servi con basilico fresco ed un filo d’olio d’oliva.

Se questo post ti è piaciuto, condividilo con i tuoi amici usando i link qui sotto. Non dimenticare di taggarmi @amatterofnourishment su Instagram se provi questa ricetta: mi piacerebbe molto vedere le tue creazioni!

Pasta with tomatoes and anchovies

(read in Italian)

Pasta, tomatoes, anchovies, spices, and extra virgin olive oil: a fuss-free pasta sauce recipe and a demonstration that with simple and good quality ingredients you don’t need much to create a delicious meal.

A delicious pasta sauce with tomato passata, fresh baby plum tomatoes, and anchovies. Ready in less than 10 minutes! Recipe on amatterofnourishment.com

I love meals that are easy to make, have a reasonable list of ingredients, and include some of my kitchen’s staples; even better if they are also rich in nutrients. This homemade pasta sauce ticks all the boxes and will satisfy even the most demanding palates with its simplicity.

Adding beans, chickpeas, or lentils to your pasta sauce is an easy and practical way to increase the nutrient content of your meal; fish, and especially the oily ones, can be another great choice.

SOME DETAILS ABOUT THIS PASTA SAUCE:

  • ANCHOVIES: they truly are the perfect addition to pasta or pizza not only in terms of flavour but also for their nutrients. An oily fish with a strong taste, rich in omega-3 fatty acids, niacin, and selenium.
  • TOMATOES: if you have been following this blog and my social media pages for a while now, you know I’m an advocate of choosing as much as possible seasonal foods. This recipe is a wonderful way to use ripe tomatoes during Summer – choose baby plum tomatoes (datterini) if you can find them because cherry tomatoes are simply not the same thing. Baby plum tomatoes are my go-to choice for pasta: whether you decide to use them raw, roasted, or sautéed, you won’t be disappointed by their consistency and taste. When datterini are not available, opt for sun-dried tomatoes: there’s no need to re-hydrate them before cooking because this step will happen while the sauce is bubbling away.
  • PASTA: to get the most out of this recipe, choose a short-cut pasta. Here I’ve used some whole grain penne, but fusilli or rigatoni would be delicious, too. You are looking for something with a rough surface to welcome your tasty homemade pasta sauce! Choose a gluten-free option if necessary.
A delicious pasta sauce with tomato passata, fresh baby plum tomatoes, and anchovies. Ready in less than 10 minutes! Recipe on amatterofnourishment.com

PASTA WITH TOMATOES AND ANCHOVIES

Ingredients (serves 2)

  • 160 g whole grain pasta
  • 200 ml tomato passata
  • 100 g ripe baby plum tomatoes (datterini)
  • 8-10 anchovies
  • 1/3 tsp black pepper (better if freshly grounded)
  • a pinch of cayenne pepper
  • 3-4 leaves of fresh basil or mint
  • extra virgin olive oil

Cook the pasta in a pot of boiling water according to the instructions on the package. In the meantime, prepare the sauce: in a pan, mix the anchovies (break them into smaller pieces with your hands or using a fork), the tomato passata, 3/4 of the plum tomatoes (chopped in half), and the spices. Warm up the sauce and add a bit of cooking water from the pasta when necessary (add just 1 o 2 tbsp each time – the final result should be creamy, not watery). The sauce will be ready in the same time that takes to the pasta to cook. When the pasta will be ready, add it (drained and cooked “al dente”) in the pan with the sauce – add the remaining part of plum tomatoes (chopped in half) and mix well for approx. 30 seconds. Serve with some fresh basil and a drizzle of olive oil.

If you liked this post, share it with your friends using the buttons below. Don’t forget to tag me @amatterofnourishment on Instagram if you try this recipe: I’d love to see your creations!

Burger vegetariani ai ceci con halloumi e pesche

(read in English)

Con un buon burger vegetariano fatto in casa vai sempre sul sicuro; ancora meglio se puoi abbinarlo a pesche, halloumi, coriandolo e burro di frutta secca per creare una combinazione di diversi sapori e consistenze perfettamente bilanciata.

Chickpea veggie burgers with fried halloumi and peaches

Sono sempre alla ricerca di nuove combinazioni per i miei burger fatti in casa e, onestamente, posso dire che questa è davvero una di quelle azzeccate. In questa versione, ogni ingrediente apporta nutrienti e gusto in un modo davvero unico:

  • il burger con i ceci e le mandorle come ingredienti principali ha un sapore piuttosto neutro; ho deciso di aggiungere anche delle zucchine per cambiare un po’ la consistenza senza creare un mix di gusti troppo forte
  • la salsa ha un sapore riccco ed aggiunge un non so che di piccante al piatto: è il mio condimento a base di burro di frutta secca senza la curcuma e con un po’ di pepe di cayenna in più
  • le foglie d’insalata aggiungono un po’ di freschezza ed il coriandolo aiuta a bilanciare il burger
  • le pesche e le fette di halloumi sono un’ottima accoppiata: la prima è morbida e dolce (e diventa ancora più gustosa grazie ad una veloce cottura in padella), mentre l’altro è saporito, pungente e mantiene una buona consistenza anche da cotto
  • il pane: ciò che cerchi è qualcosa capace di avvolgere tutti gli ingredienti in un abbraccio, quindi scegli un panino tipo brioche; uno a base di farina integrale sarebbe ottimo. Qui io ho utilizzato un pane fatto in casa al cacao, ma potenzialmente potresti scegliere qualsiasi tipo di panino, l’importante è che sia morbido

L’halloumi è un formaggio tipico dell’isola di Cipro: è caratterizzato da una combinazione di sapore e consistenza abbastanza unica e solitamente viene preparato con un misto di latte di capra e pecora. Se non l’hai mai provato ma ti piacciono i formaggi dal sapore deciso, ti consiglio di dargli una possibilità: ci sono tante ricette in cui lo puoi utilizzare! Preparare l’halloumi passato in padella per questa ricetta è molto semplice e, grazie alla cottura, il suo sapore diventa anche più buono.

Ho voluto includere in questa ricetta vegetariana anche le pesche perchè risultano buonissime quando usate in preparazioni salate: insieme a prugne, fragole e mirtilli sono tra i tipi di frutta che preferisco nelle insalate, sia a crudo che saltati in padella o cotti al forno.

Chickpea veggie burgers with fried halloumi and peaches

BURGER VEGETARIANI AI CECI CON HALLOUMI E PESCHE

INGREDIENTI

Per il burger vegetariano (per 3-4 burger)

  • 220 g di ceci cotti (sciacquati e scolati)
  • 40 g di mandorle
  • 100-120 g di zucchine grattugiate
  • 3-4 cucchiai di farina integrale (scegli la farina di avena o quella di riso integrale per un’opzione senza glutine)
  • 1 uovo
  • 1 cucchiaino di garam masala
  • 1 cucchiaino di zenzero in polvere
  • 1 cucchiaio di olio extra vergine d’oliva

Per ogni burger avrai anche bisogno di:

  • 1-2 fette di halloumi
  • 1 pesca piccola (cotta con un pizzico di garam masala ed olio d’oliva)
  • 1-2 foglie d’insalata (lattuga o invidia riccia)
  • 1 piccola manciata di coriandolo fresco
  • circa 3 cucchiaini di salsa al burro di frutta secca
  • 1 panino per hamburger

Per preparare i burger vegetariani: metti in un frullatore o un robot da cucina i ceci e le mandorle, poi aggiungi un paio di cucchiai d’acqua e lavora questo mix finchè non otterrai la consistenza che preferisci. Puoi decidere di fare dei burger con un po’ di croccantezza in più utilizzando una parte di mandorle e ceci spezzettata in pezzi di dimensione maggiore, oppure puoi scegliere di conferire ai burger una consistenza più cremosa. Metti in una ciotola il mix di ceci e mandorle insieme alle zucchine grattugiate, l’uovo, le spezie e l’olio d’oliva: mischia bene questi ingredienti, poi inizia ad aggiungere la farina e controlla la consistenza passo dopo passo. Le zucchine non devono essere grattugiate troppo finemente, altrimenti tendono a rilasciare troppa acqua (utilizza il lato della grattugia con i buchi più grossi oppure taglia la verdura in pezzi molto piccoli). Forma i burger aiutandoti usando un pochino d’olio sulle mani – prima di cuocerli, assicurati che la parte superiore dei burger sia spennellata con olio. Cuoci in forno preriscaldato a 180°C finchè non iniziano ad essere dorati (ci vorranno circa 10-15 minuti – non cuocerli troppo altrimenti diventeranno troppo asciutti).

Per cuocere l’halloumi: prepara una padella su fuoco medio ed utilizza delle fette di formaggio piuttosto spesse. Cuocilo in padella per 2-3 minuti su ogni lato finchè la superficie non sarà croccante e dorata.

Per cucinare le pesche: prepara una padella su fuoco medio con un filo d’olio d’oliva, poi aggiungi le pesche tagliate a fette abbastanza spesse e cosparse con un pizzico di garam masala. Cuoci per 1-2 minuti su ogni lato finchè le fette non inizieranno ad ammorbidirsi e ad essere leggermente dorate (le fette devono mantenere la propria forma e non sfaldarsi).

Per il condimento a base di frutta secca utilizza la ricetta che trovi in questo blog post: non aggiungere la curcuma ed includi un po’ più di pepe di cayenna in base alle tue preferenze.

Se questo post ti è piaciuto, condividilo con i tuoi amici usando i link qui sotto. Non dimenticare di taggarmi @amatterofnourishment su Instagram se provi questa ricetta: mi piacerebbe molto vedere le tue creazioni!

Chickpea veggie burgers with fried halloumi and peaches

(read in Italian)

You can’t go wrong with a tasty homemade veggie burger but it’s even better when you pair it with peaches, halloumi, coriander, and nut butter to create a wonderfully balanced combination of different consistencies and flavours.

Chickpea veggie burgers with fried halloumi and peaches

I’m always looking forward to trying new combinations for my homemade veggie burgers and I can honestly say this was a really good one. Each ingredient adds nutrients and taste in its own truly unique way:

  • the burger with chickpeas and almonds as the main ingredients is pretty basic in taste; I’ve decided to add some courgettes as well, to change the consistency without creating a too strong combination of flavours
  • the sauce is quite rich in taste and adds some spiciness to the mix: it’s my go-to nut butter dressing minus turmeric and with a bit of extra cayenne pepper
  • the green salad leaves add freshness and the coriander helps in balancing the burger
  • the peaches and the slices of halloumi make a perfect pair: one is sweet and soft (and gets even more tasty thank to the quick cooking step), while the other is salty, tangy, and firm
  • the bread: you want something able to wrap in a hug all your ingredients, so look for a brioche-style bun; a whole grain option would be delicious. Here I’ve used some homemade chocolate bread but you could virtually use any kind of bun, as long as it’s soft

Halloumi is a Cypriot firm cheese: it’s usually made with goat and sheep milk and it has a pretty unique combination of taste and consistency. If you have never tried it and you love cheese with a strong flavour, definitely give it a go: there are so many recipes in which you can use it! Making the pan-fried halloumi for this recipe is really easy and, while it’s cooking, the tangy notes of this cheese get even better.

I wanted to include in this vegetarian recipe some peaches because they are absolutely delicious when used in savoury preparations: along with plums, strawberries, and blueberries are my favourite kind of fruit to add in a salad, both raw and sautéed or roasted.

CHICKPEA VEGGIE BURGERS WITH FRIED HALLOUMI AND PEACHES

INGREDIENTS

For the vegetarian patties (makes 3-4)

  • 220 g cooked chickpeas (rinsed and drained)
  • 40 g almonds
  • 100-120 g grated courgettes
  • 3-4 tbsp whole grain flour (use oat or brown rice flour if you need a gluten-free option)
  • 1 egg
  • 1 tsp garam masala
  • 1 tsp ground ginger
  • 1 tbsp extra virgin olive oil

For each burger you’ll also need:

  • 1-2 slices of halloumi
  • 1 small peach (cooked with a pinch of garam masala and olive oil)
  • 1-2 leaves of salad (lettuce or romaine)
  • 1 small handful of fresh coriander
  • approx. 3 tsp of nut butter dressing
  • 1 burger bun

To make the patties, blend the chickpeas and the almonds with a couple of tablespoons of water until you get the right consistency according to your preferences. You can add some crunchiness to the patties leaving inside some bigger pieces of almonds and chickpeas, or you can opt for a smoother finish. Place this mix in a bowl along with the grated courgettes, the egg, the spices, and the olive oil: combine all the ingredients, then start adding the flour and check the consistency step by step. The courgettes should not be finely grated, otherwise they will release too much water (use the side with larger holes in the grater or chop them into tiny pieces). Shape the patties using a little bit of olive oil on your hands and be sure they are oiled on top before cooking them. Bake the patties in a preheated oven at 180°C until they turn golden on the outside (approx. 10-15 minutes – don’t overcook them otherwise they will turn out too dry).

To cook the halloumi: prepare a pan over medium heat and fry the thick slices of cheese for 2-3 minutes on each side until they are crispy and golden on the outside.

To cook the peaches: prepare a pan over medium heat with a small drizzle of olive oil, then add the thick slices of peaches seasoned with a pinch of garam masala. Cook for 1-2 minutes on each side until the slices will be soft and start to turn more golden on the outside (they need to keep their shape).

For the nut butter dressing, use the recipe you can find in this blog post: don’t add turmeric but include a bit more of cayenne pepper according to your preferences.

If you liked this post, share it with your friends using the buttons below. Don’t forget to tag me @amatterofnourishment on Instagram if you try this recipe: I’d love to see your creations!

Insalata di patate, fragole e ceci con condimento a base di frutta secca

(read in English)

L’Estate è decisamente la stagione dei piatti giganti di verdura che prevedono solo una preparazione veloce e quest’insalata colorata servita con la mia salsa al burro di frutta secca ne è un perfetto esempio!

Potato, strawberry, and chickpea salad with the easiest nut butter dressing

Un condimento per l’insalata fatto con olio extra vergine d’oliva di buona qualità, pepe nero ed erbe aromatiche fresche (ed eventualmente anche un po’ di aceto balsamico) sarà sempre una combinazione imbattibile. Ma, alle volte, fa bene cambiare un po’ le cose: questa salsa a base di burro di frutta secca o un condimento cremoso con l’avocado sono entrambi ottime idee per variare il gusto di una semplice insalata e per includere con facilità più nutrienti nell’alimentazione.

Quest’insalata è un bell’esempio di equilibrio tra gusto e nutrienti: da un lato ci sono i sapori più ricchi della frutta secca, delle patate e dei ceci, mentre dall’altro lato troviamo la freschezza delle fragole e delle foglie di insalata:

  • se le fragole non sono disponibili, per sostituirle puoi usare una pesca o un paio di prugne
  • la combinazione di quest’insalata vegana con i ceci e del burro di frutta secca crea un piatto con un buon mix di carboidrati, proteine, grassi e micronutrienti. Inoltre, ti dà anche l’opportunità di includere nello stesso pasto diversi tipi di frutta e verdura, aiutandoti a creare più varietà nella tua alimentazione
  • per quanto riguarda l’insalata, opta per lattuga, invidia, scarola, o rucola (a parte il radicchio rosso, qualsiasi tipo di insalata si adatta bene a questa ricetta)
  • come alternativa al burro di frutta secca, puoi usare la tahini (pasta di semi di sesamo)

Solitamente, in una classica insalata di patate, farei semplicemente bollire le patate, ma quando le utilizzo in piatti in cui non sono le protagoniste, questa cottura in 2 passaggi conferisce a tutto il piatto un non so che di speciale.

QUI TROVI LA MIA GUIDA DETTAGLIATA PER PREPARARE LE PATATE AL MEGLIO OGNI VOLTA:

  • lava e taglia le patate (senza pelarle)
  • mettile in una pentola d’acqua fredda e porta ad ebollizione: cuoci le patate finchè non iniziano a diventare morbide ma sono ancora sode (controllale con una forchetta – non aspettare fino al momento in cui inizieranno a sfaldarsi)
  • scolale e mettile in una teglia da forno, poi aggiungi un filo d’olio d’oliva, un pizzico di sale e di pepe nero (includi anche altre spezie in base alle tue preferenze)
  • cuoci le patate in forno a 180°C per circa 10-15 minuti, così diventeranno croccanti all’esterno e morbide all’interno
  • lascia che le patate si raffreddino prima di aggiungerle nell’insalata o metterle in frigo

Puoi conservare le patate cotte in frigorifero per un paio di giorni ed usarle per creare tante insalate estive tutte diverse.

My go-to nut butter dressing
Potato, strawberry, and chickpea salad with the easiest nut butter dressing

Insalata di patate, fragole e ceci con condimento a base di frutta secca

Ingredienti (per 2-3 persone)

  • 300 g patate cotte
  • 4-5 manciate di foglie d’insalata
  • 8 cucchiai di ceci precedentemente cotti
  • 1 manciata di fragole
  • alcune foglie di basilico fresco
  • un pizzico di pepe nero

Mischia tutti gli ingredienti per l’insalata in una ciotola o mettili direttamente nei piatti individuali. Servila con la salsa a parte: come vedrai dagli ingredienti elencati qui sotto, questo condimento include olio d’oliva e spezie; in base alle tue preferenze, puoi decidere se aggiungere all’insalata altre spezie o un filo d’olio in più.

Per la salsa a base di burro di frutta secca:

  • 3 cucchiai di burro di frutta secca (sia quello di mandorle, che quello di nocciole, o uno a base di semi sono opzioni che si abbinano bene a questa ricetta)
  • succo di 1 limone
  • 1 cucchiaio di olio extra vergine d’oliva
  • 1/4 di cucchiaino di curcuma in polvere
  • un pizzico di pepe di cayenna
  • un pizzico di pepe nero

Per preparare la salsa: mischia bene tutti gli ingredienti e aggiungi una piccola quantità d’acqua fredda se necessario per regolare la consistenza ed ottenere un risultato omogeneo.

Se questo post ti è piaciuto, condividilo con i tuoi amici usando i link qui sotto. Non dimenticare di taggarmi @amatterofnourishment su Instagram se provi questa ricetta: mi piacerebbe molto vedere le tue creazioni!

Potato, strawberry, and chickpea salad with the easiest nut butter dressing

(read in Italian)

Summer is definitely the season for giant nourishing bowls of fresh vegetables with minimum cooking involved and this colourful salad with my go-to nut butter dressing is the perfect example!

Potato, strawberry, and chickpea salad with the easiest nut butter dressing

A salad dressing made with good quality extra virgin olive oil, black pepper, and fresh herbs (and eventually some balsamic vinegar) will always be an unbeatable combination. But sometimes it’s good to change: this nut butter dressing or a creamy avocado sauce are both good ideas to add extra flavour and nutrients in a simple salad.

This salad is a beautifully balanced combination of deliciousness and nutrients: you have both the rich flavours of nut butter, chickpeas, and potatoes and the freshness of strawberries and salad greens:

  • if strawberries are not available (here I’ve used the sweetest Irish strawberries), you could use a peach or a few plums instead
  • the combination of this plant-based salad with chickpeas and the nut butter dressing creates a meal with a good mix of carbohydrates, protein, fats, and micronutrients. It also gives you the chance to combine different colours of vegetables and fruit on the same plate, helping you to increase the variety of food you eat in a day
  • for the salad greens, go for lettuce, romaine, or rocket (apart from red chicory, any kind of greens could work well)
  • as a nut butter alternative, you can opt for tahini

Usually, in a classic potato salad, I would simply boil the potatoes but when I add them to bowls in which they are not the main character, a 2-step cooking method gives to the whole meal a different delicious twist.

HERE THERE’S MY STEP-BY-STEP GUIDE TO GET THE POTATOES PERFECTLY COOKED EVERY TIME:

  • wash and chop your potatoes (skin-on)
  • place them in a pot of cold water and bring it to a boil: cook the potatoes until they start to become soft but they are still firm (check with a fork – don’t wait until they begin to easily break into pieces)
  • drain the excess of water, place the potatoes on a baking tray, add a drizzle of extra virgin olive oil, a pinch of salt, some black pepper, and other spices according to your preferences
  • quickly roast the potatoes in the oven at 180°C for approx. 10-15 minutes, so they will be crispy on the outside and soft on the inside
  • wait for the potatoes to cool down before adding them to your salad or storing them in the fridge

You can keep the cooked potatoes in the fridge for a couple of days and get creative creating a variety of Summer salads.

My go-to nut butter dressing
Potato, strawberry, and chickpea salad with the easiest nut butter dressing

Potato, strawberry, and chickpea salad with the easiest nut butter dressing

Ingredients (serves 2-3)

  • 300 g cooked potatoes
  • 4-5 handfuls of chopped salad greens
  • 8 tbsp cooked chickpeas
  • 1 handful of strawberries
  • a few fresh basil leaves
  • a pinch of black pepper

Mix all the ingredients for the salad in a bowl and serve with the dressing as a side: the sauce has olive oil and spices but, according to your preferences, you could add to your salad more spices or an extra drizzle of olive oil.

For the nut butter dressing:

  • 3 tbsp nut butter (almond, hazelnut, or a seed butter will work well)
  • juice of 1 lemon
  • 1 tbsp extra virgin olive oil
  • 1/4 tsp ground turmeric
  • a pinch of cayenne pepper
  • a pinch of black pepper

To make the dressing: mix well all the ingredients and add a small amount of cold water as required to adjust the consistency of the sauce.

If you liked this post, share it with your friends using the buttons below. Don’t forget to tag me @amatterofnourishment on Instagram if you try this recipe: I’d love to see your creations!

Pasta con fagioli, pomodori, e formaggio

(read in English)

Un’ottimo sugo cremoso per la pasta fatto in casa con fagioli rossi, pomodori passati in padella e formaggio stagionato: questa ricetta vegetariana non ha bisogno di tante parole come introduzione; è un perfetto “comfort food” con un buon equilibrio tra gusto, nutrienti e semplicità.

Pasta with beans, tomatoes, and cheese

Ci sono alcuni fattori chiave che cerco sempre in un sugo per la pasta:

  • cremosità: non c’è niente di meglio di un bel piatto di pasta tutta avvolta nel sugo, anche se è una semplice passata di pomodoro
  • gusto: il sugo ideale si sposa bene con la pasta per creare un connubbio di sapori perfetto e gli ingredienti principali non si coprono tra loro
  • semplicità: il sugo migliore è quello che puoi preparare nello stesso tempo (o anche meno) che ti serve per cuocere la pasta
  • nutrienti extra: il modo più semplice per creare un piatto più nutriente in pochi minuti. Non c’è bisogno di pensare ad un secondo da abbinare alla pasta: aggiungi semplicemente qualcosa in più nel sugo! Se non hai nulla che ti possa aiutare ad ottenere un risultato cremoso, usa il frullato e vedrai che in pochi minuti un peperone ed un cucchiaio di tahini (giusto per fare un esempio) si trasformeranno in un sugo buonissimo

A volte ti capiterà di notare che tutto ciò che stai cercando da un piatto di pasta è semplicemente il suo gusto particolare e forse vorrai mangiare o cucinare una ricetta specifica, quindi non ci sarà spazio per aggiungere ingredienti e nutrienti extra: va benissimo così! Non tutti i pasti devono necessariamente essere perfetti, bilanciati o con qualcosa in più: è importante sapere che puoi creare alcune ricette come quella in questo post e usarla come un’opportunità per includere più nutrienti nelle tue giornate, ma questo non significa che un’opzione più semplice sia in automatico fuori discussione.

Questa ricetta ha tutte le caratteristiche elecante qui sopra con la sua parte di crema creata con formaggio ed acqua di cottura della pasta (che ricorda un po’ una “cacio e pepe”), i fagioli rossi, i pomodori maturi e del buon olio extra vergine d’oliva.

Presta attenzione al tipo di pasta che scegli: per creare una combinazione vincente, scegli una pasta corta. Qui ho utilizzato dei gnocchetti sardi fatti in casa, ma le orecchiette o le mezze maniche sarebbero ugualmente buone. Usa un tipo di pasta senza glutine se necessario.

Homemade pasta (gnocchetti sardi) to go with beans, tomatoes, and cheese
Sautéed tomatoes for the pasta sauce
Vegetarian pasta sauce with cheese, beans, and mint
Pasta with beans, tomatoes, and cheese

PASTA CON FAGIOLI, POMODORI E FORMAGGIO

Ingredienti (per 2-3 persone)

  • 120 g pasta (cruda)
  • 160 g fagioli rossi (precedentemente cotti)
  • 220 g pomodori Datterini maturi
  • 3 tbsp di formaggio stagionato grattugiato (il pecorino sarebbe l’ideale, ma puoi anche mischiarlo con una parte di formaggio di latte vaccino stagionato)
  • 3 tbsp di foglie di menta fresca
  • 1/2 cucchiaino di pepe nero (meglio se macinato fresco)
  • olio extra vergine d’oliva

Per questa ricetta è meglio cuocera la pasta un pochino meno di quello che faresti per prepararla al dente, così non diventerà stracotta alla fine. Cuoci la pasta come al solito in una pentola d’acqua bollente. Quando sarà pronta, mettila da parte (scolata) e mischiala con un filo d’olio d’oliva.

Scalda un filo d’olio in una padella, poi aggiungi con attenzione i pomodori ed il pepe: falli passare in padella per circa 30 secondi, poi aggiungi 4-5 cucchiai di acqua calda ed usa una forchetta per fare un piccolo buco in ogni pomodoro. Continua a cuocerli finchè non ci sarà più acqua rimasta. Metti da parte i pomodori ed aggiungi 4-5 cucchiai di acqua di cottura della pasta nella stessa padella che hai appena utilizzato: aggiungi prima il formaggio grattugiato, poi anche i fagioli e la pasta. Continua a mischiare per circa 30 secondi o 1 minuto, finchè non otterrai un risultato cremoso. Aggiungi la menta spezzettata ed i pomodori alla fine, giusto per scaldarli. Servi con altro pepe se necessario ed una spolverata di formaggio (opzionale).

Se questo post ti è piaciuto, condividilo con i tuoi amici usando i link qui sotto. Non dimenticare di taggarmi @amatterofnourishment su Instagram se provi questa ricetta: mi piacerebbe molto vedere le tue creazioni!