Pancakes alla Zucca

(read in English)

Ogni anno aspetto pazientemente il ritorno delle zucche per aggiungerle all’impasto dei pancakes. Anche se in casa spesso usiamo cose come banane, rape o spinaci nei pancakes, non c’è niente che si possa paragonare al mischiare zucca, spezie e farina integrale.. è un insieme di ingredienti che ha sempre un non so che di speciale!

Ci tengo a fare un appunto sulla ricetta, visto che quest’impasto tende ad essere un po’ più difficile da gestire rispetto ad altri. Ho provato varie combinazioni per questi pancakes (e ne proverò tante altre in futuro, visto che adoro improvvisare) ed anche questa ricetta ho dovuto prepararla un paio di volte prima di poter essere sicura delle quantità. Se aggiungi troppa zucca e/o troppo liquido, tendono a rimanere troppo molli e non si cuociono bene. Consiglio di utilizzare della zucca cotta al forno (per il contenuto d’acqua) e controllare l’impasto passo dopo passo – in realtà, questo è un passaggio che trovo molto istruttivo ed utile perchè ti aiuta ad essere più consapevole di ciò che stai facendo e di come prepari i tuoi piatti!

Io ho deciso di servirli con sciroppo di datteri e delle mele tagliate a tocchetti (saltate in padella per 1 minuto con un pochino di ghee e della cannella). Chiara x

Pancakes alla Zucca

Ingredienti

  • 100 g di zucca cotta (meglio se cotta al forno)
  • 80 g di farina integrale (grano o farro – usa la farina di riso integrale per una versione senza glutine se necessario)
  • 1 uovo
  • 1 cucchiaio di semi di lino macinati
  • circa 70 ml di acqua o bevanda vegetale (quelle alla nocciola, mandorla, o anacardi sono ottime in questa ricetta)
  • 1 cucchiaino di ghee o burro (ammorbidito a temperatura ambiente)
  • 1 cucchiaino di lievito per dolci
  • 1 cucchiaino di cannella in polvere
  • 1 cucchiaino di zenzero in polvere
  • un pizzico di pepe di Giamaica (puoi usare la noce moscata in alternativa)
  • un pizzico di sale

In una ciotola, mischia le spezie, l’uovo, il ghee, i semi di lino, e la zucca (prepara una purea di zucca frullandola con la minima quantità di acqua o bevanda vegetale necessaria). Inizia ad aggiungere la farina ed altro liquido se necessario (a questo punto avrai usato già una parte del liquido per frullare la zucca, quindi ne avrai solo una piccola part avanzata per l’impasto). Mischia bene con una frusta finchè non otterrai un impasto omogeneo e senza grumi. Avendo la zucca nell’impasto, è importante controllare la consistenza passo dopo passo. Scalda una padella, meglio se anti-aderente, su fuoco medio con 1/3 di cucchiaino di ghee. Usa circa 3 cucchiai di impasto per ogni pancake e cuocili da entrambi i lati finchè non si riescono a girare bene con una spatola. Continua a mischiare l’impasto anche mentre cuoci i pancakes (con queste quantità dovresti riuscire a prepararne circa 6).

Pumpkin pancakes

(read in Italian)

Every year, I patiently wait for the return of pumpkins to add them into my pancakes. While at home we both love adding some mashed bananas or beetroots or spinach into pancakes, the combination of pumpkin, spices, and whole grain flour is always a bit magical!

But keep in mind that adding pumpkin to your pancakes can be tricky! I had to adjust the batter a few times to get it right but, in the end, the result was delicious. If you add too much pumpkin and/or liquid, they just remain too moist and not well cooked. So just go for roasted pumpkin, with less water, and check your batter step by step as you prepare it – I actually love this step: you learn to be more aware of what you are doing and how you prepare your food!

I have decided to top them with some date syrup and chopped apples tossed with a bit of melted ghee and cinnamon.

Pumpkin Pancakes

Ingredients

  • 100 g cooked pumpkin (better if roasted)
  • 80 g whole grain flour (use wheat or spelt – brown rice flour for a gluten-free version if needed)
  • 1 egg
  • 1 tbsp milled flaxseeds
  • approx. 70 ml water or a plant-based drink (hazelnut, almond, or cashew work well)
  • 1 tsp of ghee or butter (softened at room temperature)
  • 1 tsp baking powder
  • 1 tsp cinnamon powder
  • 1 tsp ginger powder
  • a pinch of all spice
  • a pinch of salt

In a medium-sized bowl, combine spices, ghee, flaxseeds, egg, pumpkin (make a puree with your pumpkin using a blender – add the minimum amount of water or plant-based drink necessary to blend it). Mix well these ingredients and start adding the flour (add also more liquid when necessary – at this point, you have already used some of the total amount to blend the pumpkin, so you have just a small part left). Stir until there are no lumps. The batter tends to be particularly tricky due to the pumpkin, so learn how to check it step by step. Heat a frying pan, preferably a non-stick one, on medium heat with 1/3 tsp of ghee. Use 3 tbsp for each pancake, moving the pan until the batter is evenly distributed. Cook each pancake until it can be easily flipped with a spatula. Keep the batter well mixed. Using these quantities, you will be able to make approx. 6 pancakes.


“Find me featured in Twinkl’s Great & Ghostly Guide to Halloween!”


My experience with a Facial Rejuvenation treatment

Nowadays there are so many facial treatments to choose from: I’ve decided to share with you more information about this facial rejuvenation session because it involves different techniques and it’s a lovely way to tune in to your body and get to know your skin better!

If you have been following my blog or social media pages for a while, you know that I’m a huge supporter of all the little things that can help us to take a better care of ourselves on a daily basis. Many people think that self-care means having at least one day off each week to spend taking care of themselves and having only that single thing to do. We all know that reality is a little bit different, things don’t always go as planned and it’s not so common having the chance to dedicate one entire day each week to yourself. So, it’s important to think about what you can do on a daily basis to show yourself some love… small choices that seem simple but can actually be life-changing!

I’d like to help you figure out what you can do at home in first place and also simple treatments that you can book without necessarily have to take a day off at the spa. That’s why I’d like to meet other people who work in the wellness world and give you some examples of HOW YOU CAN EASILY SUPPORT YOUR WELL-BEING in different ways… you’ll hear from my voice about the treatment, how does it work, how it made me feel and which are the benefits that I’ve noticed.

Recently, I had the pleasure to try a Chinese Cupping and Gua Sha Facial Rejuvenation treatment with Amanda Nordell at Dublin Wellness Centre: it’s a treatment based on a combination of different techniques that Amanda carefully adapts to your own needs.

DSC_1053-2

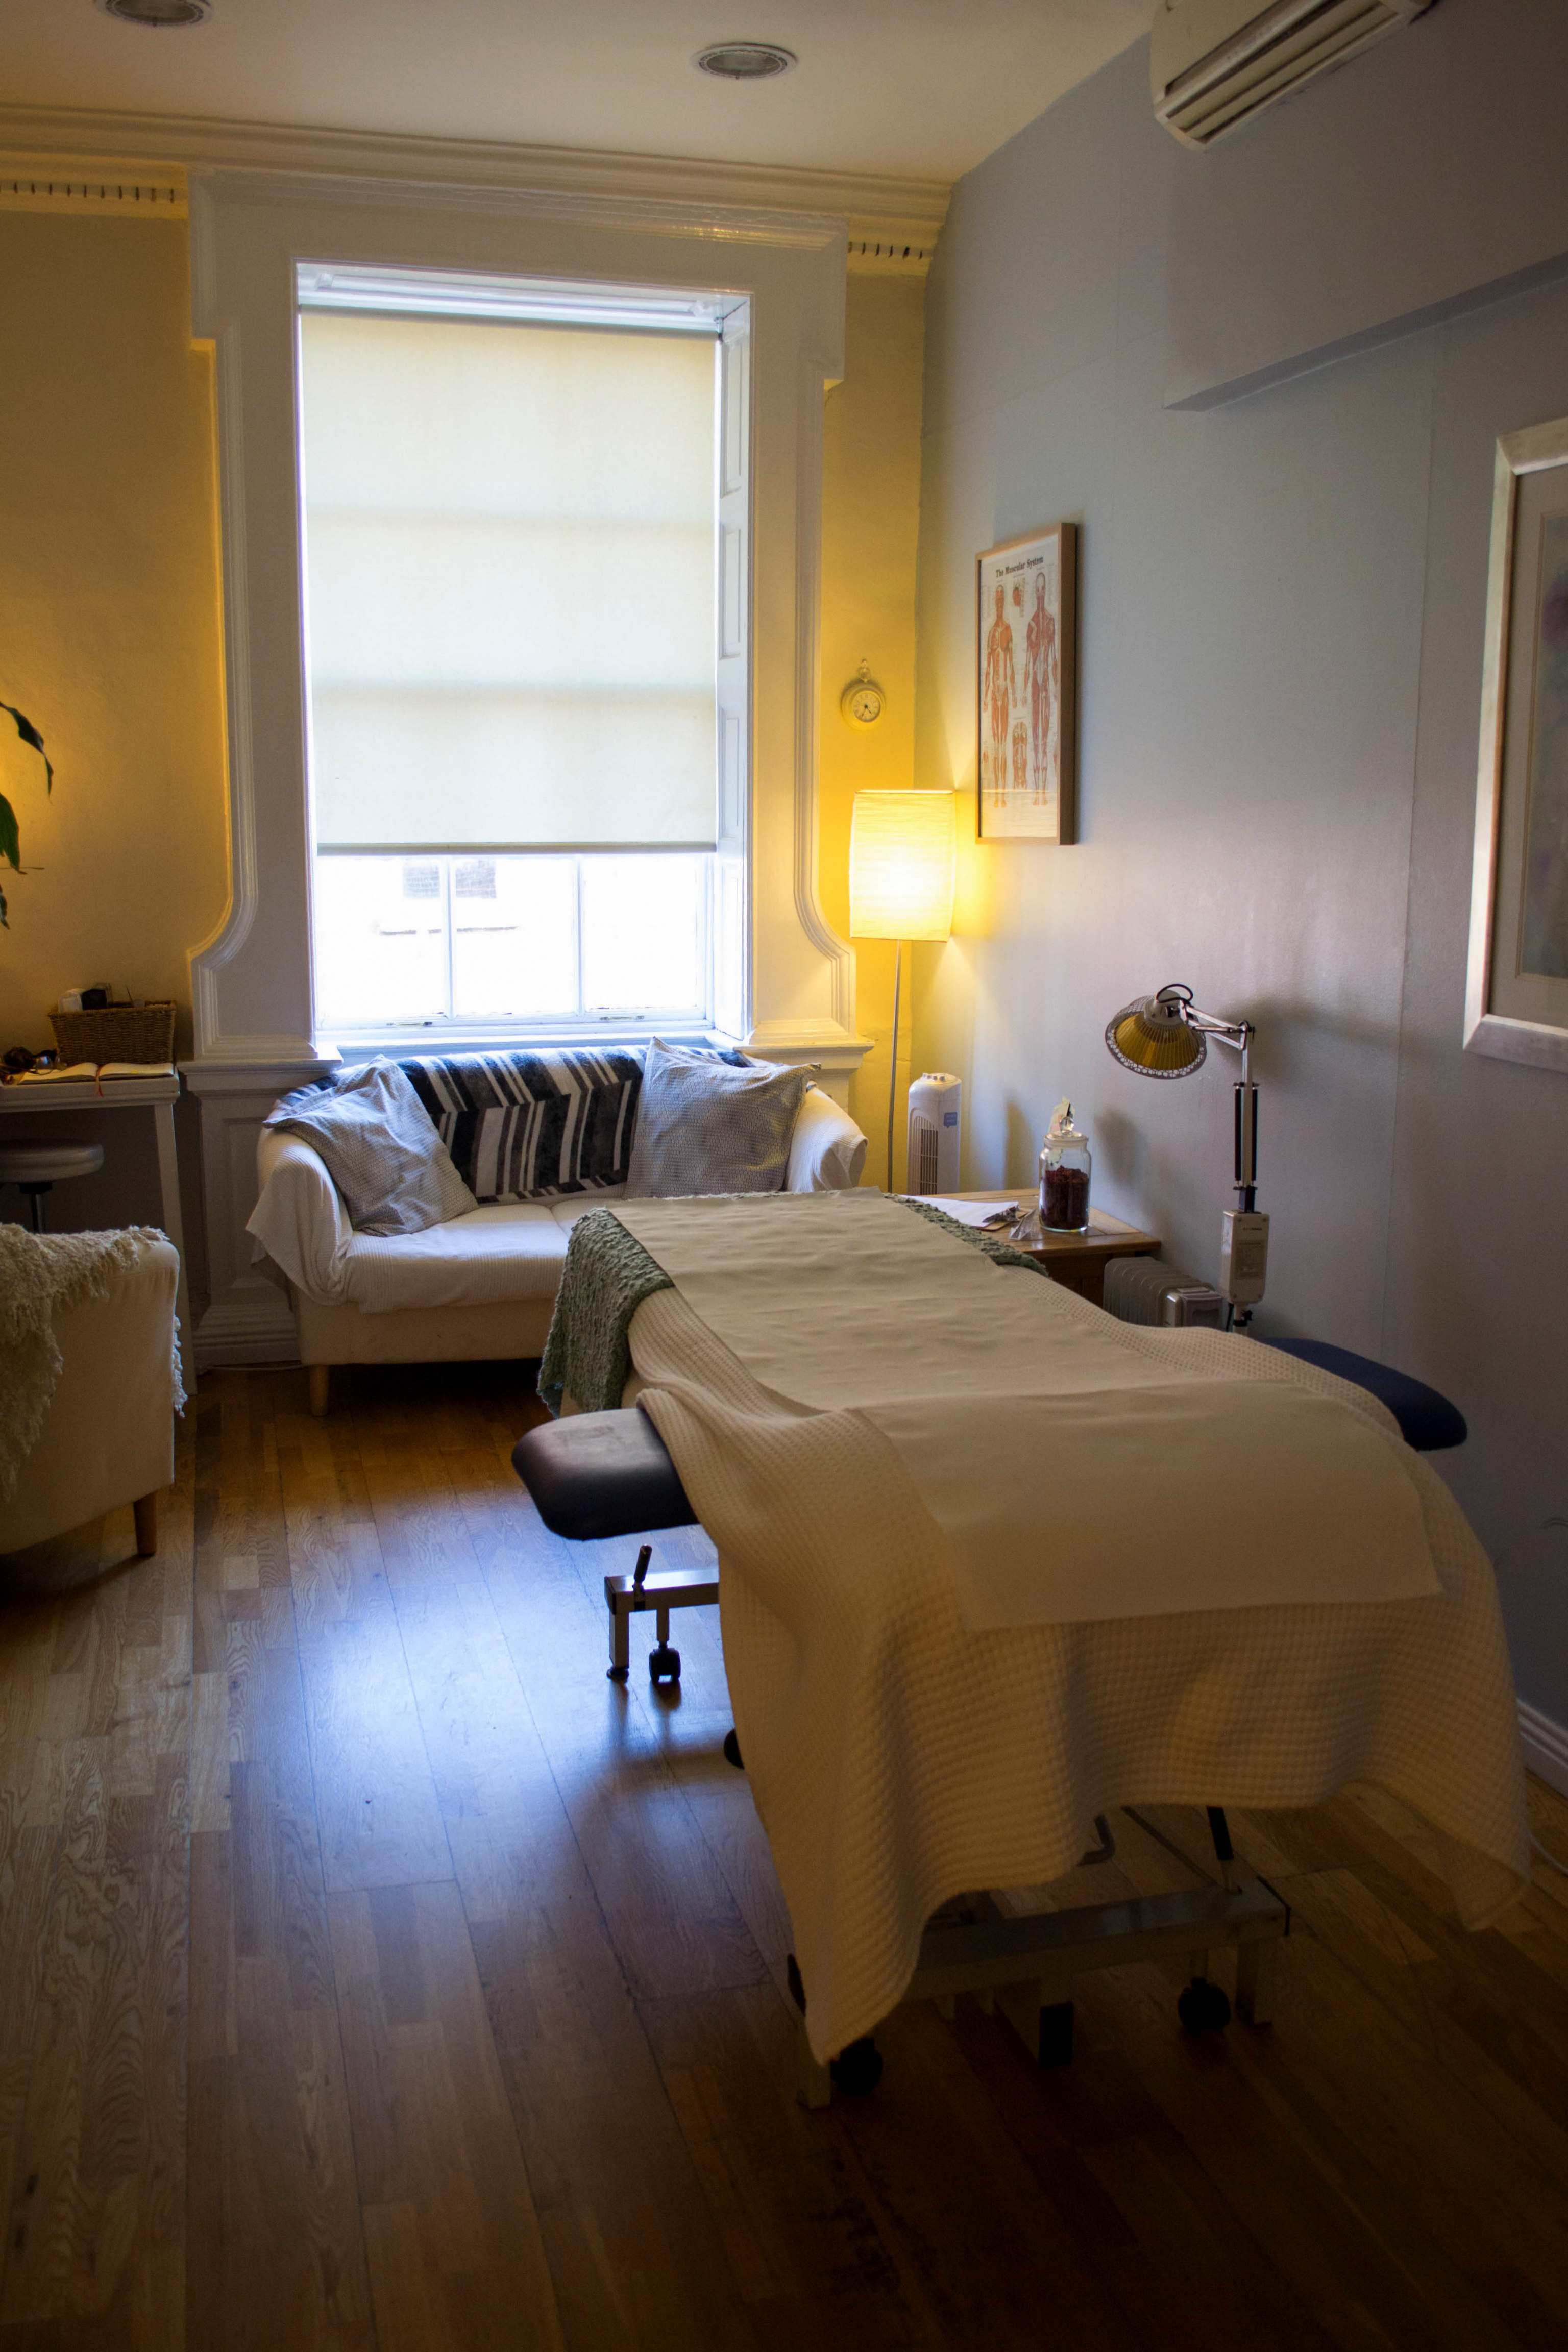
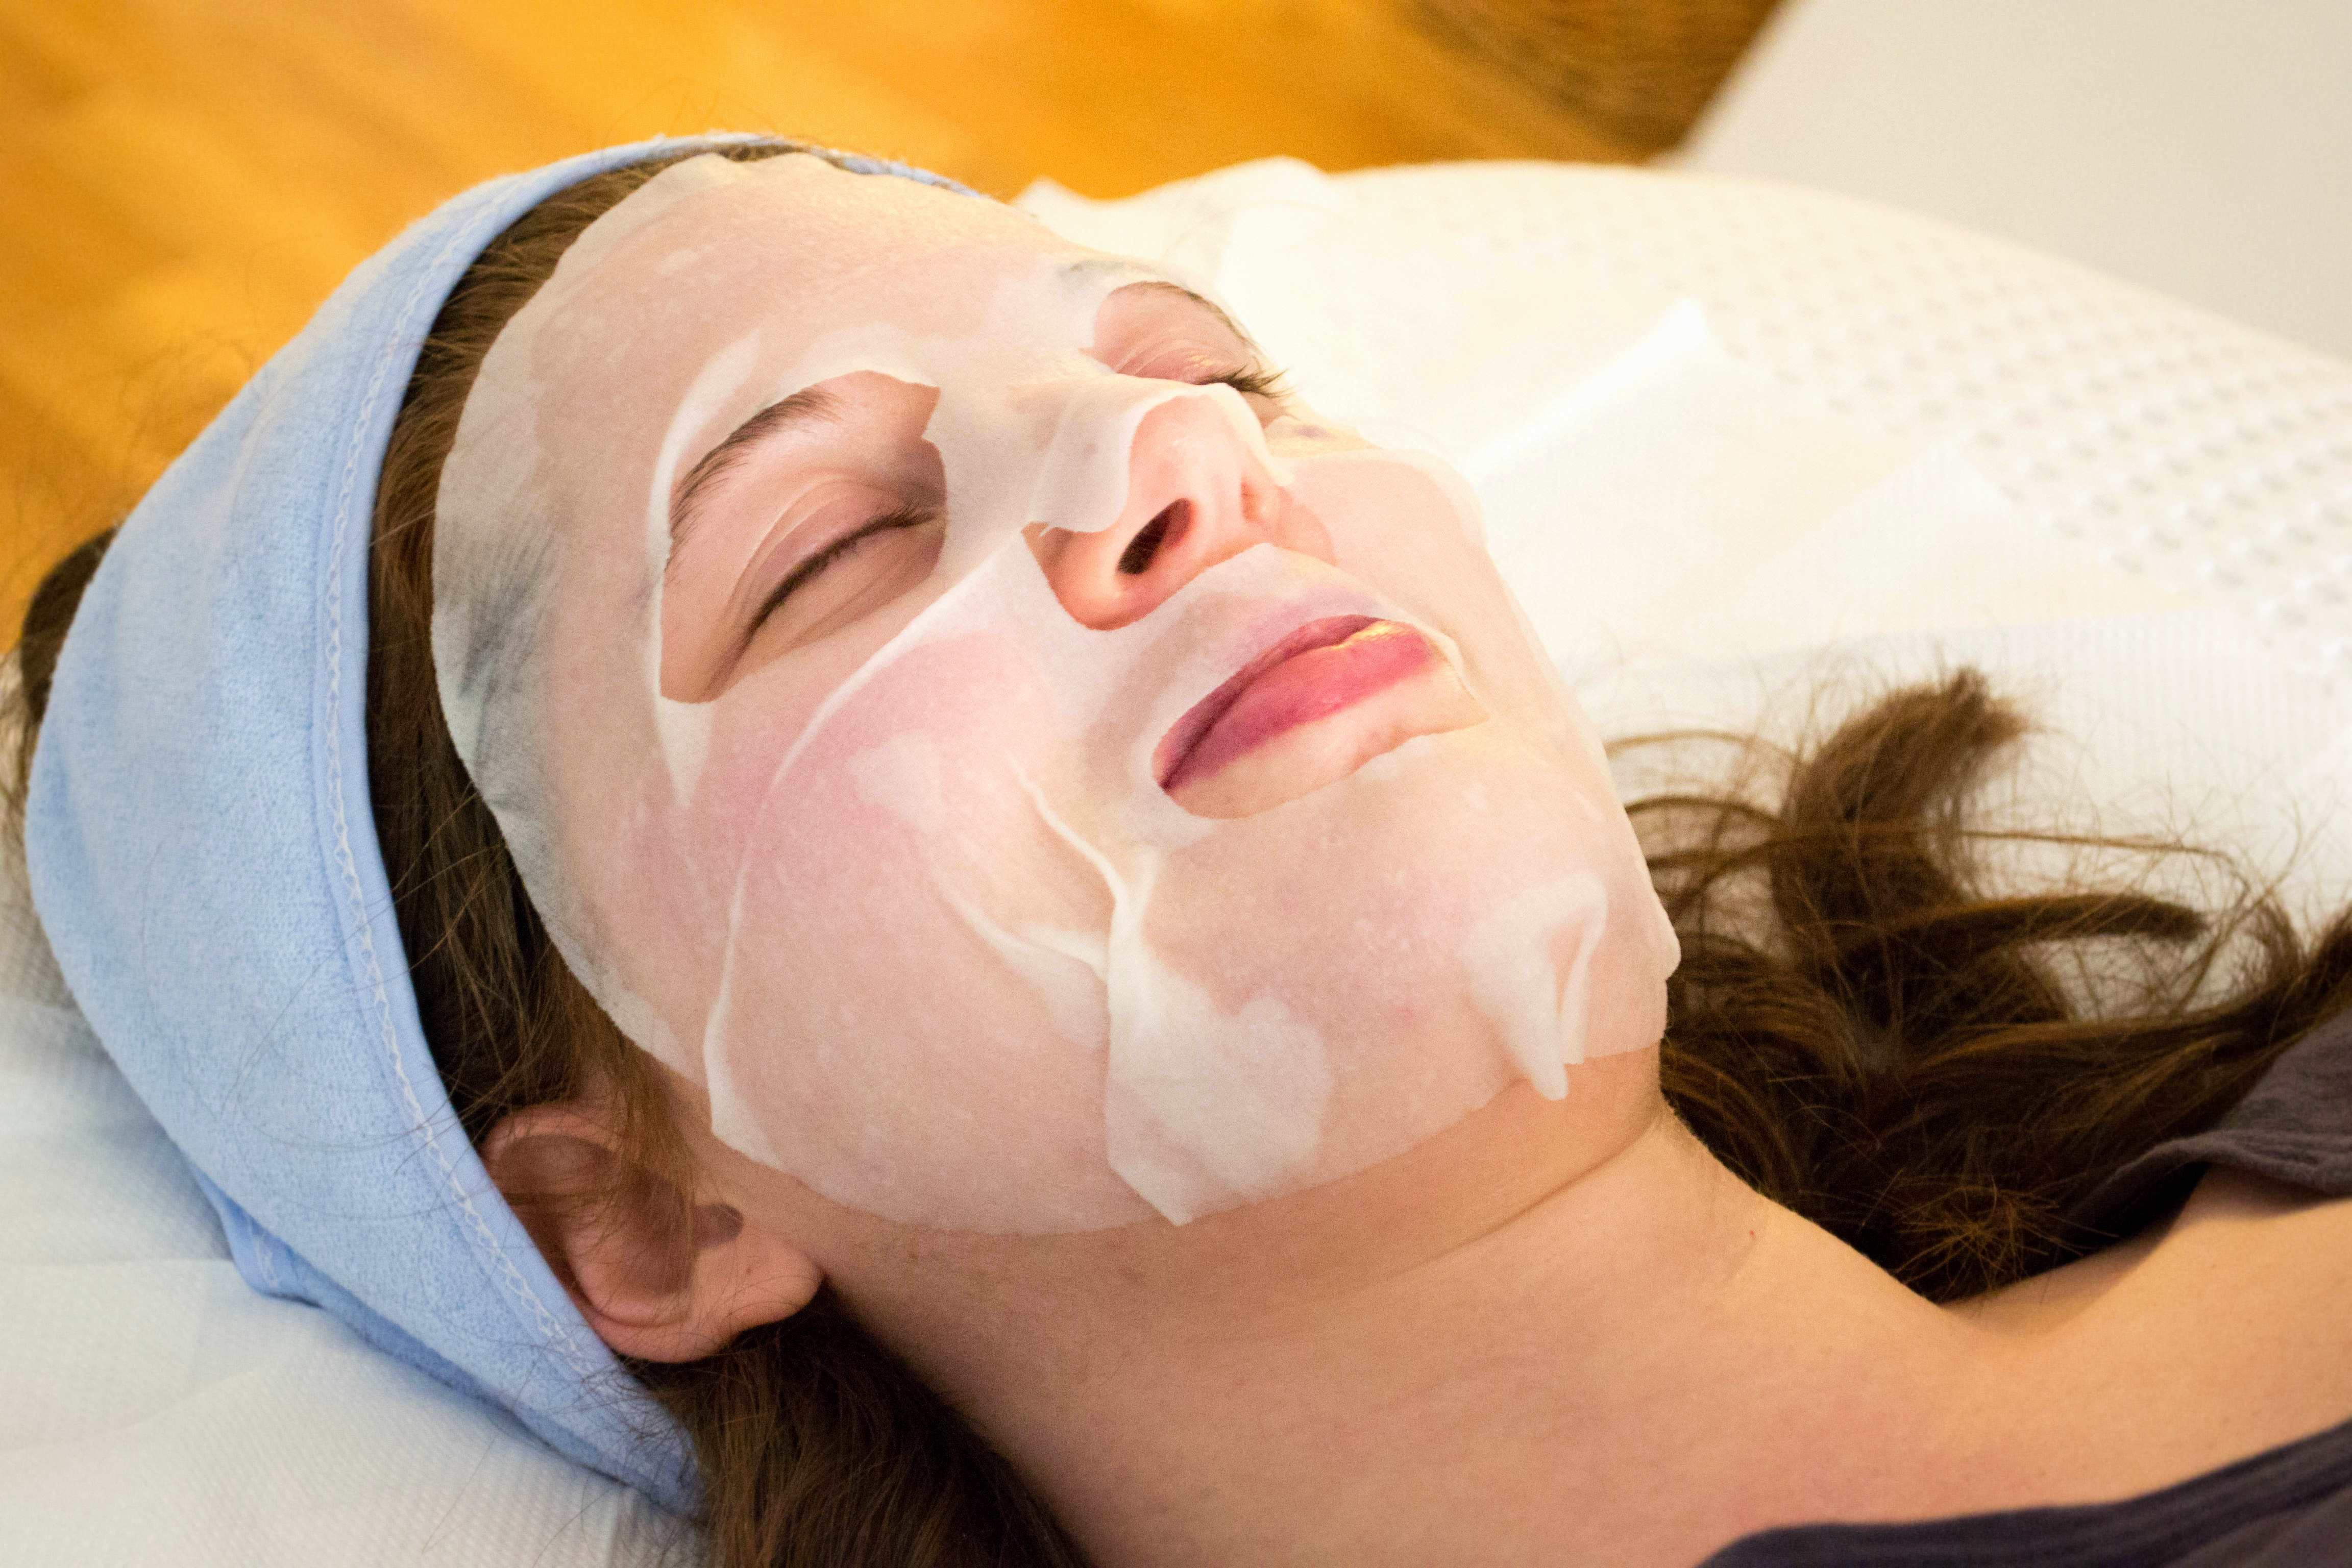
What is it all about? The treatment lasts approx. 1 hour and includes the use of gua sha tools, a jade roller, natural facial oils, cupping (with silicone cups), basalt stones, and a face mask. You can also get a standard acupuncture treatment as part of the session as an extra support for your well-being and general balance. It’s a relaxing hour and even if it may sound a bit scary getting cupping on your face, the truth is that it doesn’t hurt and leaves no red marks, my skin was refreshed and rejuvenated following the treatment.

The combination of facial cupping and gua sha is both relaxing for the mind and body, and invigorating for the complexion and facial muscles. For this kind of treatment, Amanda works with clients who have a wide range of needs, including who have specific skin conditions such as acne, rosacea, psoriasis, or eczema and also with people who want to prevent/reduce the signs of aging. The facial can help reduce fine lines and wrinkles and reduce sagging tendencies. As she mentioned to me, there’s no downtime after the session and this makes it even easier for all of us thinking to fit this relaxing time into a busy schedule.

What I really loved about the treatment (apart from the glowing skin that I had right after it) is the idea that it helps your whole face to find its balance again and to shine from the inside out – it’s a way to give some extra support to your skin and muscles on their everyday job. No magic tricks or big promises: it’s a deep and gentle facial massage based on specific instruments, nutrients (from oils and masks), and temperatures.

Something else I really appreciated is the approach that Amanda has toward natural products. We are all aware that the word “natural” is used to advertise a wide range of stuff (and often is the perfect way to trick customers) and it can have several meanings – the best thing to do is having a better look at what there is actually behind the “natural” label. As Amanda mentioned to me, her focus is on getting products that are organic when possible, and free from parabens, silicones, mineral oil, and alcohol.

DSC_1014.jpg

SOME DETAILS…

My specific needs: I’ve received the treatment a few days after having a cold, with a sinus inflammation, a dry skin (I tend to have a dry skin due to psoriasis but this time was also due to the previous cold), and a few hormonal spots. Amanda took some time before starting the treatment to have a chat, tell me that the treatment could also be helpful for my sinus inflammation, explain to me that she decided to use a hydrating bamboo mask and that the hormonal spots may worsen after the session but only because the skin is clearing itself. The results: right after the treatment I was relaxed and energised at the same time – it’s a facial but it lasts one hour, so it actually feels like taking a proper “self-care break” in the middle of the day. I’ve noticed immediately the re-hydration and a clear change in my skin’s texture, the entire face looked (and felt) renovated and refreshed – hormonal spots cleared after a few days and I had a good improvement in my sinus inflammation. I always preach about listening to your body and what mine told me in the evening after the session with Amanda was to slow down and take more time off (I even went in bed way earlier than usual). Every time I go for a treatment or I do something to take care of myself, I always feel some extra motivation afterward to keep doing it and to be more consistent in adding self-care into my priorities (when I’m busy I tend to forget about using face creams, oils, self-massage, etc).

DSC_1008

The treatment is divided into several steps: it starts with a gentle and quick massage to apply the oil, then the use of some tools (jade roller, gua sha, etc..) not only helps with muscles and blood circulation, but it also allows the oil to be absorbed better into the skin. Gua sha, jade roller, and cupping are used before the mask, then basalt stones are the final part of the session. The tools for gua sha are used to do a gentle scraping action on the skin (this means that the layers are starting to be stimulated – you’ll also feel the skin that gets warmer), while the jade roller is naturally cold and massages the face. The technique used for cupping promotes circulation and relieves muscle tension (warm temperature), the mask nourishes the skin and the basalt stones are used again to massage the face.

Even if I love getting a massage and I truly believe that treatments like massage or acupuncture are a great and simple way to support our well-being (from both personal experience and from what I’ve learned in my training to become a Lomi Lomi massage therapist), I’m usually not keen in booking myself in for a facial. But this treatment is actually something completely different because it involves the use of tools and all the different steps follow a logical pathway that you can clearly understand and feel with all the little changes on your skin.

I would definitely recommend having this treatment with Amanda if you live in Dublin or nearby – it’s a good value for money (€65) and her non-judgemental, experienced, and down-to-earth approach will definitely help you to feel comfortable and enjoy the treatment. I also hope that what I’ve written here will be helpful and inspiring for all of you who live somewhere else!

**This treatment was a gift but all opinions are mine unless otherwise stated**

Chiara x

DSC_1037-2


ABOUT AMANDA:

Amanda is a registered acupuncturist with AFPA, the oldest and largest professional body for practitioners of Traditional Chinese Medicine in Ireland. She is a graduate of The Acupuncture Foundation of Ireland and has completed a clinical internship at the WHO Collaborative Center of Traditional Medicine at Nanjing University, China. This programme consisted of extensive clinical instruction at Jiangsu Province General Hospital and Military Hospital 454.

Amanda was privileged to work with the renowned Dr. Wen Lei Qiao during her time in China. Dr. Qiao’s treatment philosophy is well respected across Europe and the world. Her principles of pain-free needling, use of a few needles as possible along with a gentle, consultative approach with clients is proven to create optimum results. Amanda adheres to this approach and in addition to traditional body acupuncture she uses abdominal, auricular (ear) and wrist-ankle acupuncture techniques. Also, traditional Chinese cupping therapy and moxibustion.

Amanda has 20 years of experience working in the areas of health and social care firstly as a nurse and subsequently in the area of child and vulnerable adult protection. She has worked in general medicine, surgery, pediatrics, care of the elderly, mental health, learning disability and addiction. Amanda draws on this knowledge to provide a holistic, person-centered experience for each patient treating them according to their unique specific symptoms.

Through the principles of Traditional Chinese Medicine, she focuses on promoting health, preventing illness, and treating health challenges through natural alternatives that complement and enhance Western Medicine treatments.

To find more details about the treatments and schedule an appointment with Amanda, click HERE: www.amandanordell.com

Apple Galette

(read in Italian)

I’m using this apple galette that I’ve prepared recently to talk about FOOD & MINDSET.

Starting to be more AWARE of the entire process of nourishing, means working on the connection with your body and the food that you CHOOSE to eat, but it also means that you’ll truly put into practice the idea of moving from eating to nourishing

Learn how to listen and trust your body – giving it what it needs, and not ignoring the messages that will eventually send you even in the busiest times. Start putting yourself first and love taking care of yourself!

And yes, I’m saying this with a galette, that is packed with nutrients & flavor but it would absolutely not fit into the classic standards of “healthy” or “clean”.

Start to move on from the classic standards of “healthy” and “unhealthy”, and start looking at the ingredients, food combinations, quality of products, your body’s needs, etc.

DSC_1451

LET’S BREAK DOWN THE GALETTE

  • almost all the ingredients in this galette are organic
  • the dough is made with only whole grain flour
  • there’s a bit of date syrup but otherwise, I’ve played with apples and spices to avoid adding extra sugar (get creative!)
  • there’s a good amount of apples considering the size of the galette
  • there’s some tahini in the dough too
  • loved cooking with these Irish apples from the farmers’ market (connect with your food!)
  • I’ve shared it with my boyfriend (food is not just energy for your body!)
  • there’s some yogurt in the homemade ice-cream that I’ve used but you can also serve the galette with some yogurt (hello probiotics!)
  • it was exactly what I wanted and a perfect way to celebrate those delicious apples (enjoy your food!)

NOW IT’S YOUR TURN:
what can you do today to work a bit on your approach toward food?

Chiara x

DSC_0981

DSC_1155

DSC_1169

DSC_1433

APPLE GALETTE

Ingredients

For the dough:

  • 130 g whole grain flour (wheat or spelt)
  • 35 g butter
  • 1.5 tbsp tahini
  • 2 tsp date syrup
  • approx. 60 ml milk or hazelnut drink
  • 1 tsp cinnamon powder

For the filling:

  • 3 apples (approx. 390 g – preferably cooking apples)
  • 1 tsp cinnamon
  • 1 tsp fennel seeds (crushed in a mortar)
  • a splash of lemon juice
  • 1/2 tsp butter (optional)
  • approx. 1 tsp coconut flour (optional)

In a bowl, mix the softened butter (at room temperature) with tahini, date syrup (1 tsp), and cinnamon. Add the flour and mix well until you get a crumble-like consistency, then start adding the liquid in small portions (a different flour may require a bit less or more liquid). Mix the ingredients with a spoon for this first part, then in the end quickly knead the dough with your hands – it should be ready in a few minutes overall. If you are not using it straight away, place the dough in the fridge using a covered bowl.

Slice the apples, mix them with the spices and a splash of lemon juice. Roll out the dough (you’ll end up with a circle of approx. 20 cm of diameter) and sprinkle the coconut flour to prevent the base from becoming too soggy. Start adding the sliced apples, then fold the dough up and over the apples to create a border (wet your fingertips to press the internal part of the border and ensure it will stay in place).

Bake in a pre-heated oven at 180°C until the galette is golden brown (approx. 20-25 minutes – I don’t overcook the apples and they are still slightly crunchy at the end). When it’s almost ready, take the galette out from the oven: brush the border with a mixture made of date syrup (1 tsp) and milk or plant-based drink (2 tsp) – add 1/2 tsp of butter in small pieces over the apples. Place in the oven again for a couple of minutes.

Serve slightly warm or at room temperature with a dollop of ice-cream or yogurt on top.


Remember: you can choose a healthier lifestyle & eat delicious food, become a more intuitive eater, learn to trust your body, choose what is best for you, and support your well-being every day! Click on the button below to take the first step:

SCHEDULE A FREE CONSULTATION

Galette alle Mele

(read in English)

Uso questa galette alle mele che ho preparato di recente per parlare di alimentazione e consapevolezza.

Iniziare ad essere più CONSAPEVOLI dell’intero processo legato a “nutrirsi” vuole dire lavorare sul rapporto con il tuo corpo e con il cibo che scegli di portare in tavola, ma vuole anche dire mettere veramente in pratica l’idea di passare dal semplice “mangiare” a vedere il cibo come vero e proprio “nutrimento” per il corpo e la mente, un supporto per il tuo benessere, ed un aiuto per affrontare al meglio le tue giornate.

Impara come sia possibile ascoltare il tuo corpo e riporre fiducia nei segnali che ti invia ogni giorno, senza ignorarlo anche nei momenti più difficili e dandogli quello di cui ha bisogno. Inizia a metterti al primo posto ed a prenderti cura di te!

Dico tutto ciò come commento ad una galette che, sebbene sia ricca di nutrienti ed anche ottima di sapore (la ricetta sarà sul blog a breve) non rientrerebbe per nulla nei classici canoni di “sano” o “clean”.

Inizia a fare un passo avanti rispetto ad i classici standard di “sano” e “non sano”, ed inizia a prestare attenzione ad ingredienti, combinazioni alimentari, qualità dei prodotti, necessità del tuo corpo, etc.

DSC_1451

VEDIAMO INSIEME QUALCHE DETTAGLIO SULLA GALETTE

  • quasi tutti gli ingredienti sono biologici
  • la base è fatta con farina integrale
  • c’è una piccola parte di sciroppo di datteri, ma per il resto ho valorizzato il sapore dolce delle mele mischiandole alle spezie per cercare di non aggiungere zucchero (è importante cercare di essere più creativi!)
  • considerando le dimensioni della galette, c’è una buona quantità di mele
  • c’è anche un po’ di tahini nella base
  • mi è piaciuto molto poter preparare qualcosa di speciale con queste mele Irlandesi biologiche comprate al mercato (è importante anche stabilire una connessione con i vari ingredienti!)
  • l’ho condivisa con il mio ragazzo (il cibo non è solo energia per il tuo corpo!)
  • nel gelato fatto in casa che ho utilizzato per servirla c’è anche dello yogurt, ma è ottima anche servita con dello yogurt semplice (ecco i probiotici!)
  • era esattamente quello che volevo quando l’ho preparata ed è stata anche un’ottima maniera di utilizzare queste mele (apprezza appieno il cibo che scegli!)

ORA E’ IL TUO TURNO:
cosa puoi fare oggi per lavorare un po’ sull’approccio che hai verso l’alimentazione e le scelte quotidiane?

Chiara x

DSC_0981

DSC_1155

DSC_1169

DSC_1433

GALETTE ALLE MELE

Ingredienti

Per la base:

  • 130 g farina integrale (grano o farro)
  • 35 g burro
  • 1.5 tbsp tahini
  • 2 tsp sciroppo di datteri
  • circa 60 ml latte o bevanda alle nocciole
  • 1 tsp cannella in polvere

Per il ripieno:

  • 3 mele (circa 390 g – preferibilmente mele per cucinare)
  • 1 tsp cannella in polvere
  • 1 tsp semi di finocchio (spezzettati in un mortaio)
  • un pochino di succo di limone
  • 1/2 tsp burro (opzionale)
  • circa 1 tsp farina di cocco (opzionale)

In una ciotola, mischia il burro ammorbidito (a temperatura ambiente) con la tahini, lo sciroppo di datteri (1 tsp), e la cannella. Aggiungi la farina e combina il tutto finchè non ottieni una consistenza simile a delle grosse briciole – in seguito aggiungi la parte liquida in piccole porzioni (farine diverse possono necessitare di un pochino di liquido in più o in meno). Nella parte iniziale mischia gli ingredienti con un cucchiaio, poi alla fine lavora l’impasto con le mani – dovrebbe essere pronto in alcuni minuti. Se non prepari la galette subito, metti la base a riposare in frigo in una ciotola coperta.

Taglia le mele a fette, poi mischiale bene con le spezie ed un pochino di succo di limone. Stendi l’impasto (diventerà di forma circolare, circa 20 cm di diametro) e cospargilo con la farina di cocco per evitare che la base diventi troppo bagnata in cottura. Disponi con cura il ripieno della galette, poi crea un bordo piegando sopra le mele la parte di base che avrai lasciato vuota (con le dita bagnate premi delicatamente la parte più interna del bordo sulle mele affinchè conservi la forma in cottura).

Cuoci la galette in forno pre-riscaldato a 180°C finchè non diventa dorata (circa 20-25 minuti – cerco di non cuocere troppo le mele, quindi alla fine sono ancora leggermente croccanti). Quando sarà quasi pronto, rimuovi il dolce dal forno: spennella il bordo con un mix di sciroppo di datteri (1 tsp) e latte o bevanda vegetale (2 tsp) – aggiungi anche 1/2 tsp di burro spezzettato sulle mele. Metti nuovamente in forno per un paio di minuti.

Servi la galette tiepida o a temperatura ambiente ed aggiungi sopra un cucchiaio di gelato o yogurt.


Remember: puoi scegliere di avere uno stile di vita più sano, riempire i tuoi piatti con cose buone e che ti piacciono, essere più consapevole delle tue scelte, fidarti del tuo corpo, e scegliere quello che è meglio per te ogni giorno! Clicca sul bottone qui sotto per fare il primo passo:

PIANIFICA UNA CONSULENZA GRATUITA

Panzanella (bread and tomato salad)

(read in Italian)

I really love those recipes in which you can use stuff like stale bread, or overripe bananas, or the leftovers from making your own nut drink – it’s not just a brilliant way to get more creative while cooking but, obviously, it’s also good to reduce the waste. The recipe that you will find below is a perfect example: a traditional Tuscan salad with stale bread and ripe tomatoes… simple and full of flavor! I’ve made it endless times and tried so many variations that I can’t even remember all of them – but for this blog post, I’ve decided to stick with a more classic version. I’ve also decided to suggest you a simple variation with some buffalo mozzarella. Share with me a snap on Instagram if you decide to give it a go, I’d love to see your creations! Chiara x

DSC_0290-2.jpg

DSC_0720

DSC_0658

DSC_0555

DSC_0838

Panzanella (bread and tomato salad)

Ingredients
(serves 2-3)

  • 150 g stale sourdough bread*
  • 500 g ripe tomatoes
  • 1 handful of fresh basil
  • 1 1/2 tbsp apple cider vinegar (or wine vinegar)
  • 2 tsp dried thyme
  • 1/2 tsp ground black pepper
  • approx. 2 tbsp extra virgin olive oil
  • a pinch of salt

Chop the stale bread into small chunks (even if you can’t make them too small, it will be fine anyway because it will break into crumbs later on) and in a large bowl mix it with water, vinegar, half of the oil, salt, pepper, and thyme. Mix well with your hands and start to create smaller crumbs, then add the chopped tomatoes and wait at least 10 minutes before serving (in this way the bread will soak better the tomatoes’ juice). Just before serving, add plenty of fresh basil and a little bit of olive oil.

A lovely variation: add 1 buffalo mozzarella (approx. 125 g)

*it doesn’t have to be sourdough, but it’s the option that tastes better. I would also suggest you to choose a whole grain bread.


Would you like to start having a healthier diet and lifestyle, but also start building lifelong healthy habits? Are you ready for a change but need some help to get started? Click on the button below to take the first step:

Book your free call

Panzanella (insalata con pane e pomodori)

(read in English)

Mi piacciono tantissimo le ricette in cui puoi utilizzare cose come il pane raffermo, o le banane troppo mature, o quello che resta quando fai le bevande vegetali in casa – non è soltanto un bellissimo modo per essere più creativi in cucina, ma è anche ovviamente una maniera per ridurre gli sprechi. La ricetta che troverete qui sotto è un esempio perfetto: un’insalata di pane raffermo e pomodori tipica della Toscana… semplice ma ricca di sapore! Io ormai l’ho preparata talmente tante volte ed ho sperimentato così tante varianti che sarebbe impossibile ricordarle tutte – ma per questo post ho deciso di soffermarmi su una versione un po’ più classica. Condividi una foto con me su Instagram se decidi di provarla, sono sempre curiosa di vedere le vostre creazioni in cucina! Chiara x

DSC_0290-2

DSC_0720

DSC_0658

DSC_0555

DSC_0838

Panzanella (insalata con pane e pomodori)

Ingredienti
(2-3 porzioni)

  • 150 g pane di pasta madre raffermo*
  • 500 g pomodori maturi
  • 1 manciata di basilico fresco
  • 1 1/2 tbsp aceto di mele (o di vino)
  • 2 tsp timo secco
  • 1/2 tsp pepe nero macinato
  • circa 2 tbsp olio extra vergine d’oliva
  • un pizzico di sale

Taglia grossolanamente il pane raffermo (non importa la dimensione esatta dei pezzi, perchè in seguito comunque si sbriciolerà) ed in una ciotola abbastanza capiente mischialo con acqua, aceto, metà del quantitativo indicato di olio, sale, pepe, e timo. Combina il tutto mischiando con le mani e creando dei pezzetti di pane più piccoli, poi aggiungi i pomodori tagliati a pezzetti ed aspetta almeno 10 minuti prima di servire (in questo modo darai un po’ di tempo al pane per inzupparsi con il sugo dei pomodori). Aggiungi il basilico ed un filo d’olio giusto prima di mettere in tavola la Panzanella

Un’ottima variante: aggiungi una mozzarella di bufala (circa 125 g)

*non deve essere per forza di pasta madre, ma è l’opzione che risulta più buona. Ti consiglio anche di scegliere un pane integrale.


Vorresti iniziare ad avere uno stile di vita ed un’alimentazione più sani, creando anche una serie di abitudini che possano diventare parte della tua vita d’ora in avanti? Non sai esattamente da dove iniziare? Clicca sul link qui sotto per fare il primo passo:

Prenota la tua chiamata gratuita

Insalata di Orzo con Zucchine e Blue Cheese

(read in English)

Barley salad with courgettes and blue cheese

Prepari qualcosa con l’orzo ogni tanto? Lo sai che l’orzo ha un buon contenuto di beta-glucani? Esatto, lo stesso tipo di fibre che trovi nell’avena! I beta-glucani sono dei polimeri del glucosio (polisaccaridi) presenti nella parete cellulare di cereali e altri cibi (ad esempio lieviti, alghe ed alcuni funghi come reishi e shiitake – sono anche presenti in altri cibi in piccole quantità). L’effetto positivo sul colesterlo che hanno cereali come l’avena e l’orzo è stato associato con il loro contenuto di fibre solubili. La struttura dei beta-glucani è diversa in base alla fonte da cui provengono (per esempio sono fibre solubili nei cereali ed insolubili nei lieviti… il potere della chimica!). Prenderti cura di te attraverso le tue scelte riguardanti sia il cibo che il tuo stile di vita può essere SEMPLICE E PIACEVOLE… è tutta questione di mettersi un po’ in discussione e dare una possibilità a piccoli cambiamenti quotidiani!

Di seguito troverai la ricetta per un’insalata fredda con orzo, zucchine e blue cheese – io ho usato un formaggio che in poco è diventato uno dei preferiti di casa, si chiama Young Buck ed è un buonissimo blue cheese fatto con latte crudo in Irlanda del Nord. Se vivi da queste parti ti consiglio di provarlo, ma puoi anche provare varie alternative su questo stile finchè non trovi il tuo preferito! Per chi non conosce il blue cheese: è un formaggio in cui la pasta è caratterizzata da venature bluastre, con un gusto ricco e pungente – può sembrare simile al Gorgonzola in apparenza, ma sia il sapore che la consistenza sono diverse.

Barley salad with courgettes and blue cheese

20170704_140527

Barley salad with courgettes and blue cheese

Insalata di Orzo con Zucchine e Blue Cheese

Ingredienti (per 2 persone)

  • 120 g di orzo
  • circa 340 g di zucchine
  • circa 40 g di blue cheese
  • 1 piccola manciata di germogli di alfa alfa
  • 1 cucchiaino di timo secco
  • il succo di 1 limone
  • 1/2 cucchiaino di semi di finocchio (sminuzzati in un mortaio)
  • olio d’oliva extra vergine
  • 1 piccola manciata di foglie di menta fresca
  • un pizzico di pepe nero

Cuoci l’orzo seguendo le istruzioni sulla confezione. Quando sarà pronto, sciacqualo con acqua fredda e scolalo bene. Mentre prepari l’orzo, puoi tagliare le zucchine in fettine sottili e saltarle in padella con un pochino d’olio d’oliva per circa 1-2 minuti – puoi anche decidere di dividere le zucchine in due parti, poi cuocerne una metà e lasciare l’altra cruda (per un risultato ottimale, ne lascerei un po’ crude soltanto se sono zucchine di piccole dimensioni, fresche ed ancora croccanti). Quando le zucchine si saranno raffreddate, mettile in una ciotola con le spezie, il timo secco, il succo di limone, l’orzo, il formaggio e l’olio. Mischia bene tutti gli ingredienti e lascia riposare l’insalata in frigo per circa 10 minuti. Aggiungi i germogli prima di servire e metti un po’ di foglie di menta sui piatti.


Se questo post ti è piaciuto, condividilo con i tuoi amici usando i links qui sotto. Non dimenticare di taggarmi @amatterofnourishment su Instagram se provi questa ricetta: mi piacerebbe molto vedere le tue creazioni!

Barley salad with courgettes and blue cheese

(read in Italian)

DSC_1476

Do you sometimes cook with barley? Do you know that barley has a good content of beta-glucan? Yes, the same fibre that you can find in oats! Beta-glucan is a glucose polymer (polysaccharides) found in the cell walls of cereals and other food (for example yeasts, seaweeds, and some mushrooms like shiitake or reishi – it’s also found in other foods in smaller amounts).

The positive effect of grains like barley and oats on cholesterol has been associated with their content of soluble fibre. The beta-glucan structure is different based on the food source (so they are for example soluble fibre in cereals and insoluble in yeasts.. the power of chemistry!). Taking good care of yourself through your food and lifestyle choices CAN BE EASY AND ENJOYABLE.. You just need to give it a go!

Below you’ll find the recipe for a salad with barley, courgettes, and blue cheese – I have used a cheese that has easily become a favorite in my house: Young Buck, a delicious raw milk blue cheese made in Northern Ireland. You can check it out if you’ve never tried it or do a little bit of research until you find one that you really like!

Barley salad with courgettes and blue cheese

20170704_140527

Barley salad with courgettes and blue cheese

Barley Salad with Courgettes and Blue Cheese

Ingredients (serves 2)

  • 120 g barley
  • approx. 340 g courgettes
  • approx. 40 g blue cheese
  • 1 small handful of alfalfa sprouts (or your favorite sprouts)
  • 1 tsp dried thyme
  • juice of 1 lemon
  • 1/2 tsp fennel seeds (crushed in a mortar)
  • extra virgin olive oil
  • 1 small handful of fresh mint leaves
  • a pinch of black pepper

Cook the barley according to the instructions on the package. When it will be ready, simply rinse it with cold water and drain well. While you wait for the barley to cook, you can prepare the other ingredients: cut into small slices the courgettes and cook them in a pan with a little bit of olive oil for 1-2 minutes – you can also decide to divide the courgettes into two parts, then cook some of them and leave the remaining veggies raw (to get the best results, I’ll do this only with small, fresh and crunchy courgettes). Once the courgettes will be cold, place them in a large bowl with spices, dried thyme, lemon juice, barley, cheese, and extra virgin olive oil. Mix well all the ingredients and set them aside in the fridge for approx. 10 minutes. Add the sprouts just before serving and top your bowls with some mint leaves.


If you liked this post, share it with your friends using the buttons below. Don’t forget to tag me @amatterofnourishment on Instagram if you try this recipe: I’d love to see your creations!

Brownies ai Fagioli Neri

(read in English)

Mi piace tantissimo riuscire a condividere il momento della colazione con il mio ragazzo – purtroppo non capita tutti giorni, ma cerchiamo di fare del nostro meglio! La vedo come un’occasione per passare più tempo insieme, parlare dei nostri impegni per la giornata, e condividere una colazione nutriente… Tante volte è anche un’opportunità per provare delle nuove ricette – esattamente quello che è successo con questi brownies. Li ho preparati un po’ di settimane fa provando ad ottenere una buona consistenza con alcuni ingredienti che avevo in mente: la prima volta erano decisamente troppo asciutti ma il sapore era promettente! La seconda volta, invece, erano buonissimi: con un po’ della classica consistenza da brownies, ma non troppo “bagnati”.. con la crosticina sopra, ma non troppo asciutti. Noi li abbiamo mangiati sia a colazione (accompagnati da un frullato), sia dopo cena come dessert.. ottimi in entrambi i casi!

DSC_1424

DSC_1256.jpg

DSC_1189

DSC_1326

Brownies ai Fagioli Neri

Ingredienti

  • 180 g fagioli neri cotti
  • 110 g farina di riso integrale
  • 2 1/2 cucchiai di cacao in polvere non zuccherato
  • 1 1/2 cucchiai di sciroppo di datteri
  • 25 g ghee (ammorbidito – puoi utilizzare l’olio di cocco per una versione vegana, ma aggiungine un pochino di più rispetto al ghee)
  • 1 1/2 cucchiaino di lievito per dolci
  • 1 1/2 cucchiaino di zenzero fresco grattugiato
  • circa 200 ml bevanda agli anacardi

Frulla i fagioli, la bevanda agli anacardi, e lo zenzero finchè non ottieni una crema omogenea. Mettila poi in una ciotola ed aggiungi gli altri ingredienti (includendo il lievito per dolci alla fine) – mischia bene affinchè non ci siano grumi. Metti l’impasto dei brownies nella teglia, aggiustando la superficie con una spatola o il retro di un cucchiaio. Cuoci in forno preriscaldato a 180°C per circa 20-25 minuti – saranno pronti quando la parte superiore inizierà ad essere rigida ed si sarà formata una crosticina. Lascia raffreddare i brownies prima di tagliarli.

Puoi servirli con sopra yogurt Greco, cannella, e lamponi.

  • si conservano in un contenitore ben chiuso in frigo per qualche giorno
  • è importante che l’impasto dei brownies sia omogeneo e non ci siano pezzi di fagioli, per ottenere poi una buona consistenza dei brownies quando saranno cotti
  • i dolci o simili fatti con la farina di riso tendono a seccarsi facilmente, quindi non lasciarli troppo a lungo nel forno
  • sia la bevanda agli anacardi, sia il ghee (o olio di cocco) sono importanti per ottenere la classica consistenza “umida” dei brownies finiti


Vorresti iniziare ad avere uno stile di vita ed un’alimentazione più sani, creando anche una serie di abitudini che possano diventare parte della tua vita d’ora in avanti? Non sai esattamente da dove iniziare? Clicca sul link qui sotto per fare il primo passo:

INIZIAMO!